Nodes
Nodes both initialize and add computational resources to your Docker environment. They are an essential part of ensuring your clusters have enough power to meet the demand of your users and applications.
Overview

| Field | Description |
|---|---|
| Status | The build status of the node from the cloud provider as Creating, Ready, or Deleting. |
| Size | The size of the node. |
| Labels | Labels added to nodes for organization and placement constraint purposes. \nThe label Manager is assigned to the node that orchestrates the Docker Swarm. |
| Containers | A list of containers stored on the node disk. – Active container – Active container – Stopped container – Stopped container |
| Static IP | The static IP address randomly assigned to a node. |
| Port 443 | Indicates the public availability of the host over HTTPS requests (port 443). \nNote, the load balancer managed service will automatically upgrade HTTP requests (port 80) to HTTPS |
Specifications
| Name | Size | vCPU (cores) | Memory (GB) | Disk (SSD) capacity (GB) | Full specification |
|---|---|---|---|---|---|
| Small | B-series: B1ms | 1 | 2 | 30 | Click here |
| Medium | B-series: B2s | 2 | 4 | 30 | Click here |
| Large | D-series: D2s_v3 | 2 | 8 | 30 | Click here |
| X-Large | D-series: D4s_v3 | 4 | 16 | 30 | Click here |
🚧 Building a production environment?
Recommended: The D-series virtual machine sizes offer a combination of vCPU, memory recommended for most production workloads.
The B-series virtual machine sizes (Small and Medium) are ideal for workloads that do not need the full performance of the CPU continuously, like web servers, proof of concepts, small container databases and staging or development build environments.
Security
Networking
Nodes are automatically provisioned with communication privileges with other nodes and resources in the cluster. However, it is important to note that MedStack Control has been designed to disable connection attempts directly to nodes. This means that you cannot SSH into a node.
Encryption in transit
Data in transit between nodes is encompassed within the scope of Docker's overlay network.
Encryption at rest
All node disks are encrypted at rest to AES-256.
Intrusion detection system
All nodes are installed with the Threat Stack intrusion detection system (IDS).
Events detected by the IDS are managed and responded to by MedStack. MedStack adheres to our policies and controls available to you in the MedStack Control dashboard that explain how MedStack responds in the case of IDS events.
Actions
Create
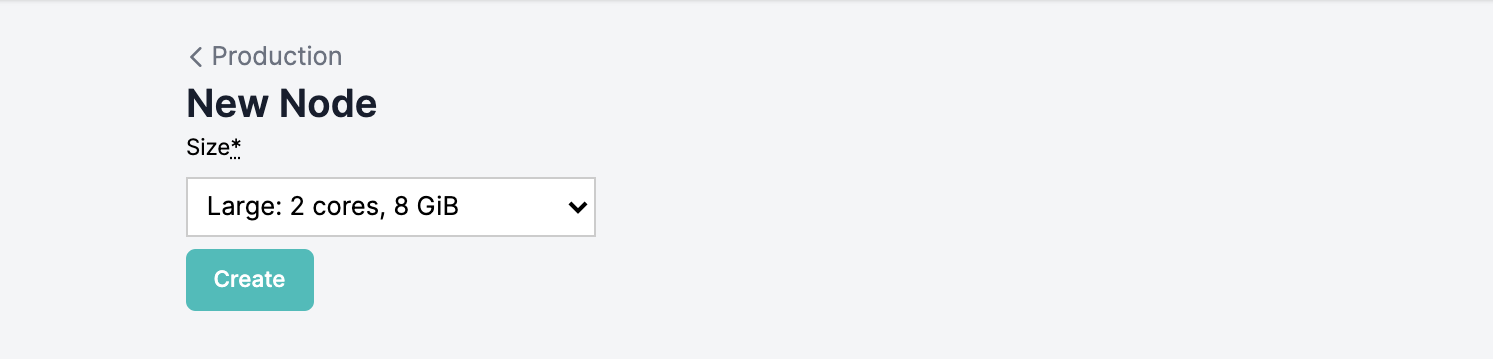
You can create as many nodes as needed to power your clusters. Nodes can be created in just a few clicks.
- In the Nodes section within the cluster, click the Create node or Create one now button.

- Select the size of node you'd like to create and click the Create button. The size description expresses the number of cores in terms of vCPUs and the memory resources in terms of gigabytes.
- You'll see the node status as Creating while it is being provisioned by the cloud provider. This can take up to 10 minutes.

- Create additional nodes as your environment needs. Any node created after the Master (initial) node is designated as a Worker node.
View metrics
You can see resource consumption metrics for a node by clicking the View metrics button from the actions dropdown button on a node.

This will open a time-series graph to show CPU, Memory, and Storage utilization over time.
Labels
You can add labels to a node by clicking the Labels button from the actions dropdown button on a node.
You may use labels to organize the nodes within a cluster. Labels are key-value pairs that can be used to set up service placement constraints that control which nodes your containers will run on.
More information on using labels and placement constraints can be found on Docker's support documentation:
- Docker docs: Add or remove label metadata
- Docker docs: Using constraints and labels
Reboot
You can reboot a node by clicking the Reboot button from the actions dropdown button on a node.
Triggering a node reboot in fact redeploys the compute instance on new virtual hardware as well as reboots the operating system. This design helps address possible complications with cloud hardware and can mitigate the impact of noisy neighbours, infrastructure networking issues, kernel upgrades, faulty hardware, etc.
You may wish to reboot a node for planned system resiliency, or as a troubleshooting effort in the following events:
- The CPU or memory resources are exhausted.
- The status of a node is unavailable.
- Ensuring node upgrades are applied.
- Cumulative updates adversing impacting reliability or performance (eg. kernel upgrades) due to prolonged system uptime.
📘 Restart Docker
If your Docker state is not available, it's possible that you may need to restart Docker. You can do this by rebooting the manager node of the cluster.
Resize
You can resize a node by clicking the Resize button from the actions dropdown button on a node.
❗️ Resizing the manager node
Be aware than when you resize the manager node, you will cause a brief disruption to your application's availability elapsing the time taken to scale the node on the cloud provider. This can take up to 5 minutes.
Remove stopped containers
Stopped containers can be removed from a node by selecting the Remove stopped containers button from the actions dropdown button on a node.
Removing stopped containers on a node permanently deletes stopped containers on that node. Other nodes with stopped containers will not be impacted by this action and will remain stopped on the other nodes.
By removing stopped containers, the logs and volume mounts configured in these containers will also be permanently deleted. The volumes attached by the mounts will not be deleted automatically by this action.
👍 Recently stopped containers with Exit errors
When you select the action to remove stopped containers, stopped containers within the past 24 hours that stopped due to an Exit error will not be removed so its logs can be viewed for troubleshooting purposes.
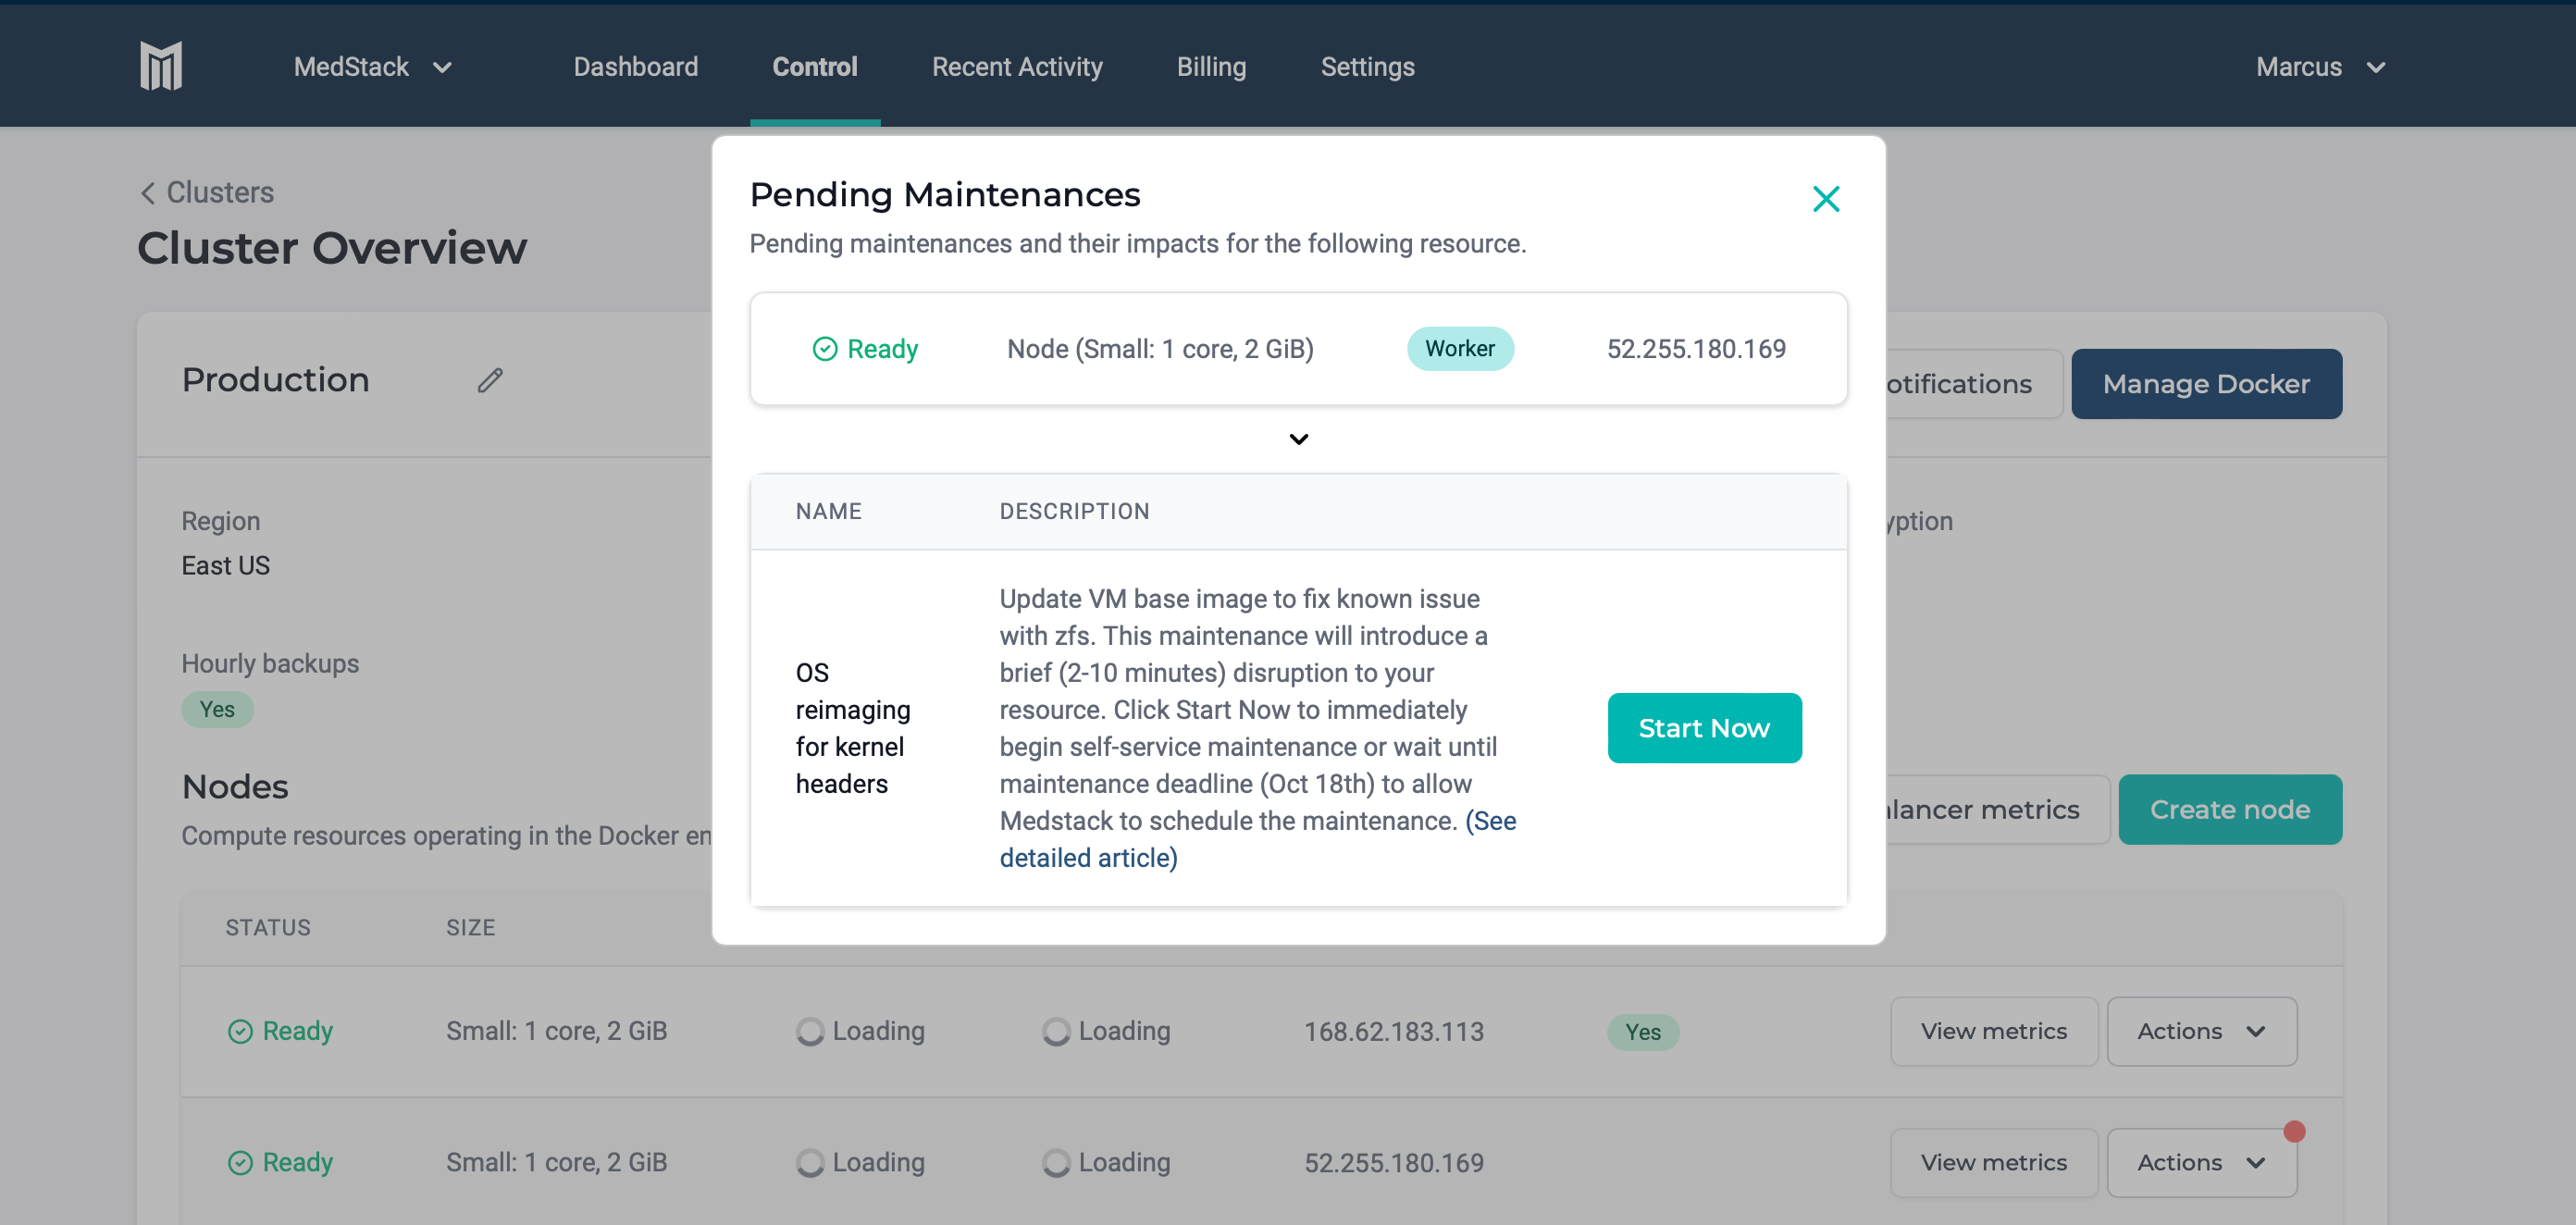
Perform maintenance
When new maintenance is available on a node, the Actions button is emphasized with a notification icon. Pending maintenances can be viewed by clicking See maintenance and can be started on demand.
Restore Volume
Docker volume backups can be restored on the same node using the restore volume feature.
🚧 Waiting for backups to restore
There are no progress indicators when restoring a volume. It is recommended that you wait at least a few minutes allowing time for the volume restore to complete, or longer for larger backups.
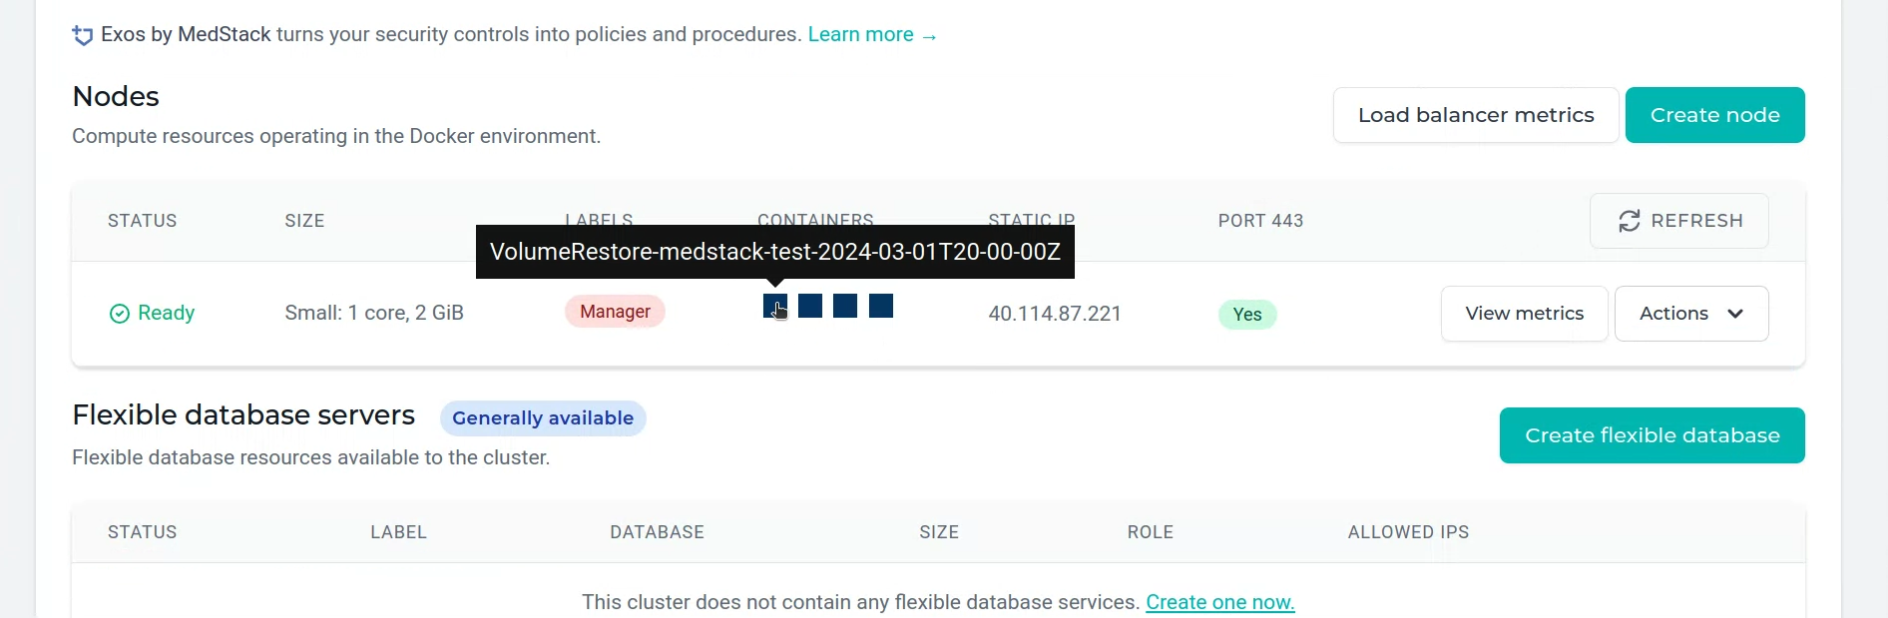
While a volume backup is being restored, a temporary container on the target node labelled
"VolumeRestore-{restoredVolumeName}"will run. When the restore has completed, the container will stop.
Note, you will need to manually refresh this page to see the changing status of containers.
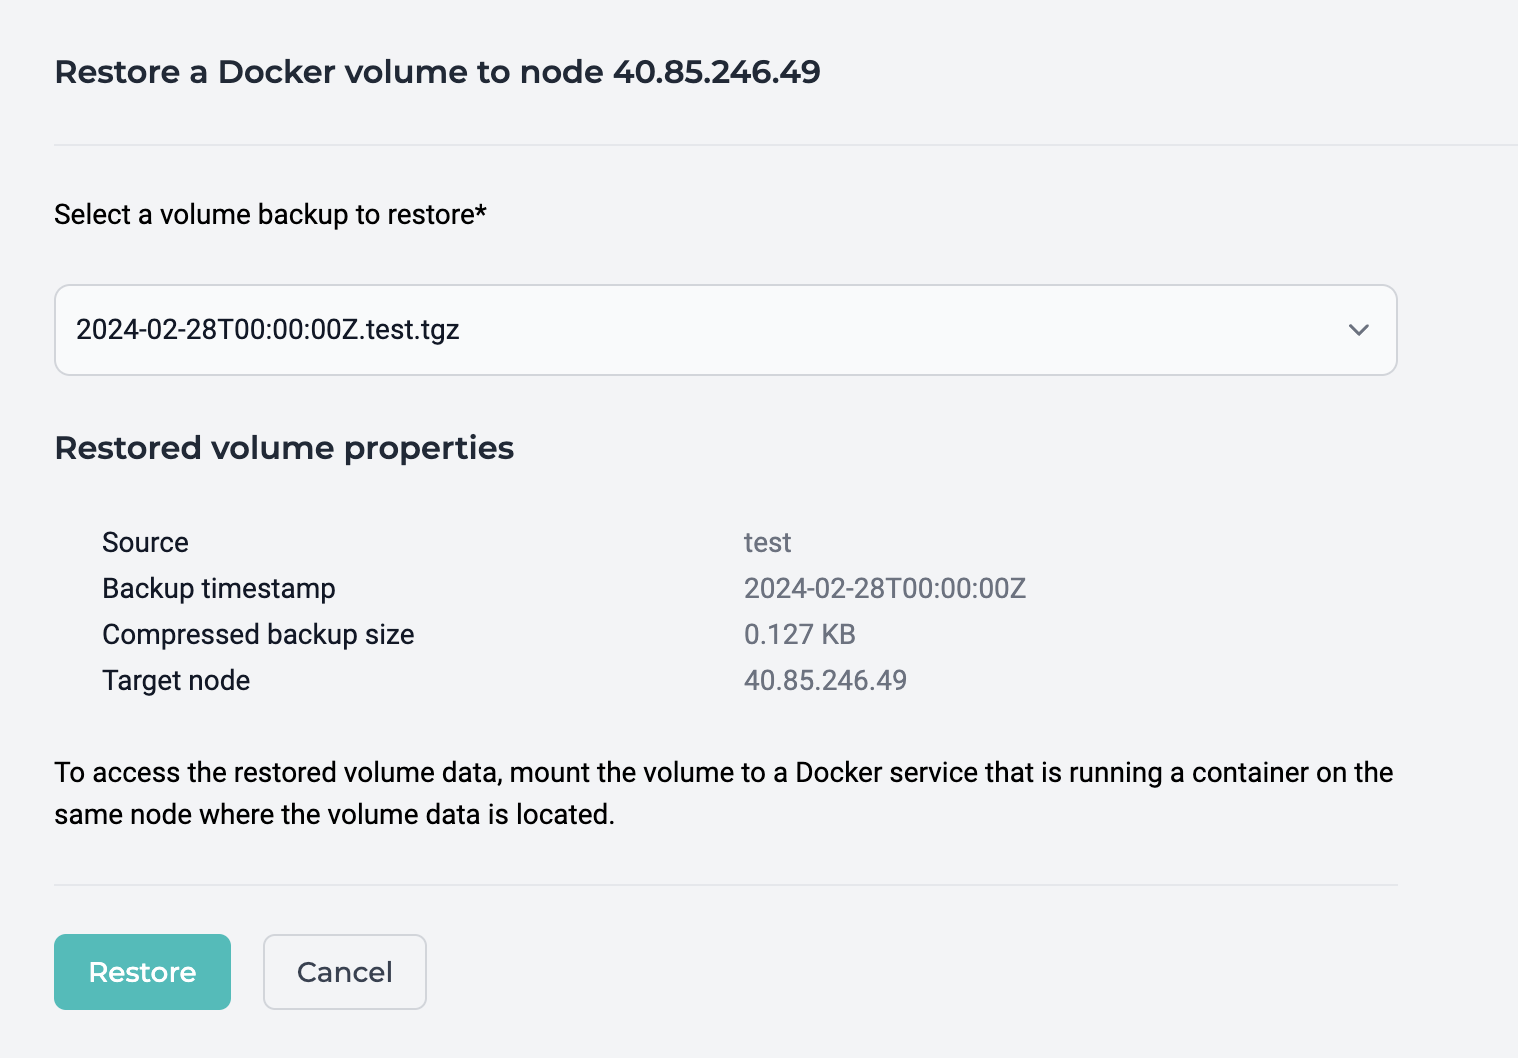
To restore and make use of a volume backup:
- Select a backup and click "Restore" to initiate the backup restoration.
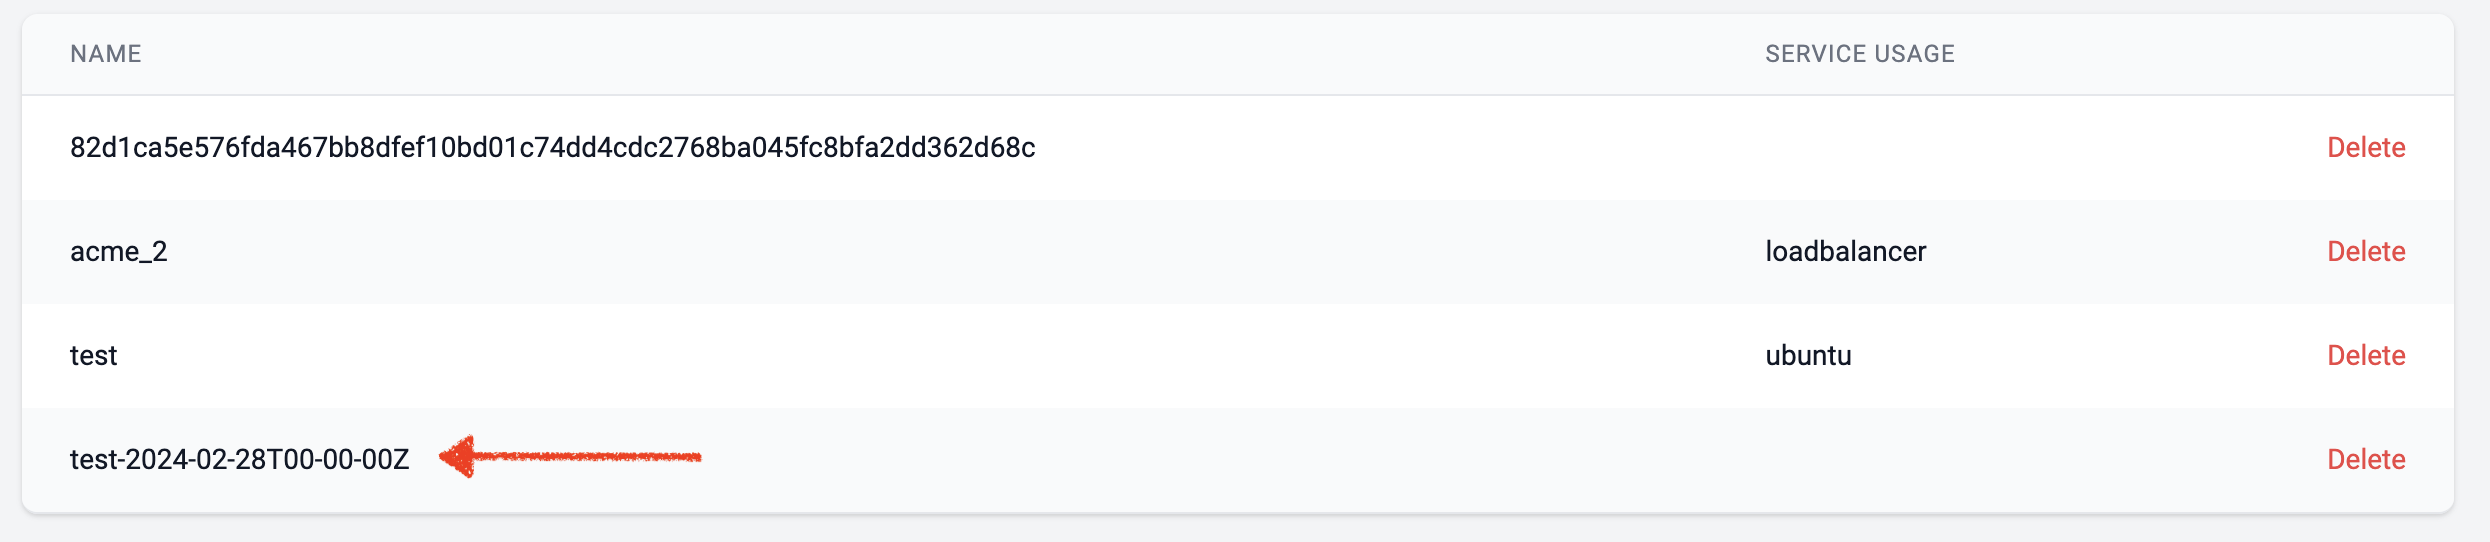
- When the restore has completed, identify the restored volume, which will have the original volume name plus the timestamp suffix.
 3. Mount the restored volume to a desired service and ensure the service container is running on the same node where the volume was restored.
4. The restored volume can be managed through the container shell.
3. Mount the restored volume to a desired service and ensure the service container is running on the same node where the volume was restored.
4. The restored volume can be managed through the container shell.
Delete
You can delete a node by clicking the Delete button from the actions dropdown button on a node.
When you delete a node, the containers running on the node will be balanced across the remaining available nodes in the cluster while following the rules of any service placement constraints.
A manager node can only be removed when there are no worker nodes left.
❗️ You'll delete data and unassign the static IP
When you delete a node, you also delete the disk mapping and the disk's data. Make sure you have moved important data from the node's disk that is to be deleted to another node in the cluster. You'll also lose the static IP address assigned to that node. There is no guarantee that creating another node will have the same static IP address.