In this guide you'll learn about connecting a database server to your Docker application using Docker secrets.
👍 Use a real example
You can follow or clone our simple flask application for this demo from our public Gitlab repository.
Create the database server
In this example, we've already created a basic PostgreSQL database server.
Capture the connection strings
Click on the database label to view the connection strings and copy the string for the relevant language.

The connection string information is formatted for difference languages. Among these different languages, the main values changing are the keys used to connect to the database, and the keys and values for the SSL configuration.
In this example, we will be using the Python connection string since we are connecting the database to a simple flask application.

Create the secret
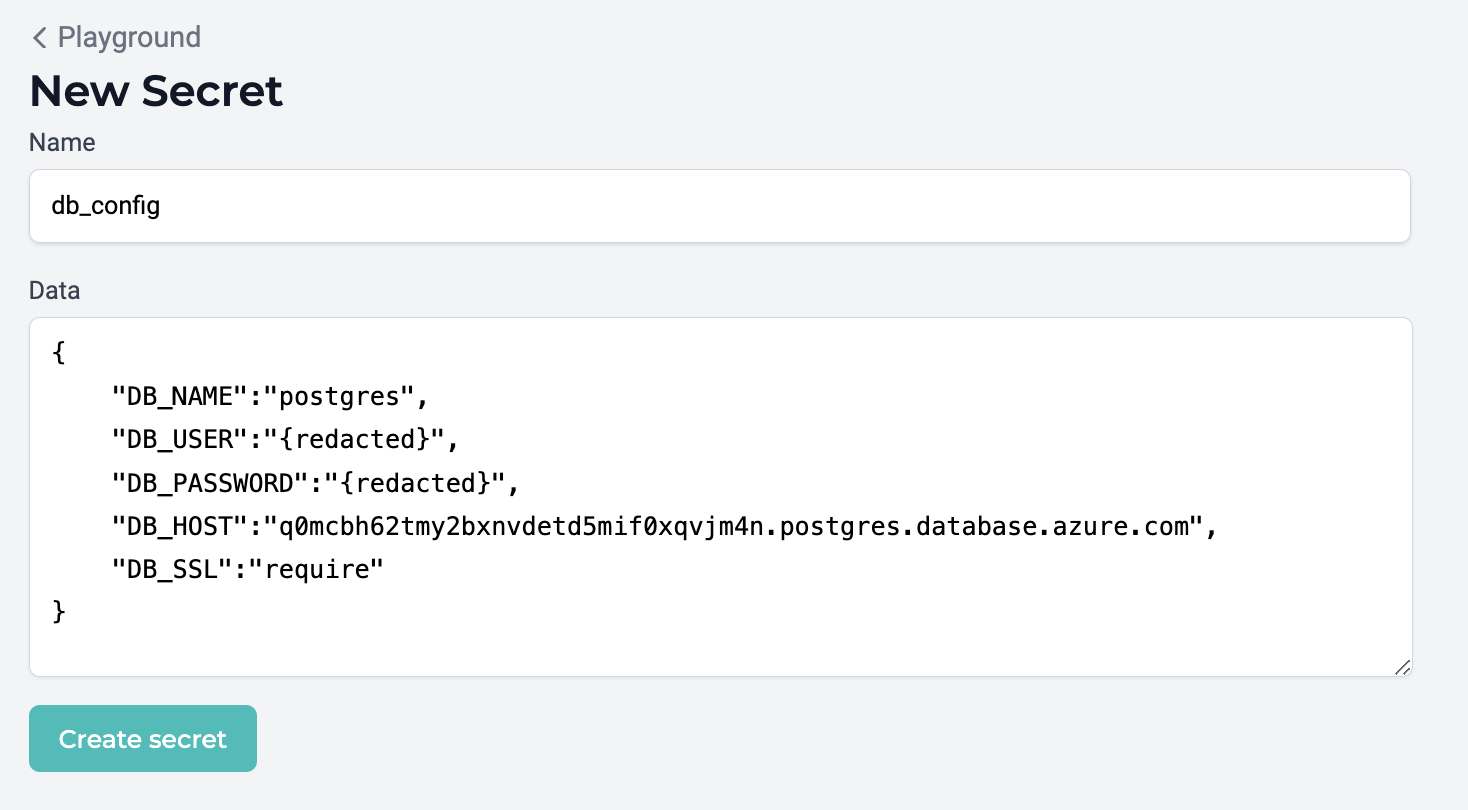
We've decided to transform the connection string into a JSON object to be ingested in the application layer.
config_db.json
{
    "DB_NAME":"postgres",
    "DB_USER":"{redacted}",
    "DB_PASSWORD":"{redacted}",
    "DB_HOST":"if6bstjyu009z4o0srucvvucdmfgixbu.postgres.database.azure.com",
    "DB_SSL":"require"
}
Create a secret using the JSON object. Click here to learn about creating Docker secrets.
Modify the application
Since we're choosing to implement a connection string as a Docker secret, we know it will need to be mounted in the service configuration as a file in the directory /var/run/secrets/. Thus, we will need to modify the application layer to ingest the connection string file from this directory.
Open the secret
Here is an example showing how the application is expecting to be able to open the secrets file once we update the service configuration.
app.py
import json

with open('/var/run/secrets/config_db.json') as json_file:
    data = json.load(json_file)

DB_NAME=data["DB_NAME"]
DB_USER=data["DB_USER"]
DB_PASSWORD=data["DB_PASSWORD"]
DB_HOST=data["DB_HOST"]
DB_SSL=data["DB_SSL"]
Create the database server URI
We format the database server URI in the application layer using the secret's values.
app.py
def make_db_uri(db_name):
    database_uri = 'postgresql+psycopg2://{dbuser}:{dbpassword}@{dbhost}:{dbport}/{dbname}'.format(
            dbuser=DB_USER,
            dbname=DB_NAME,
            dbpassword=DB_PASSWORD,
            dbhost=DB_HOST,
            dbport=5432
            )
    return database_uri
Create a database
In order to create a database on the database server, we need to establish a connection to the database server using the URI and then create the database.
app.py
def create_db():
    engine = sqlalchemy.create_engine(make_db_uri("postgres"), connect_args={'sslmode':DB_SSL})
    conn = engine.connect()
    conn.execute("commit")
    conn.execute("create database %s" % DB_NAME)
    conn.close()
Run
With the mechanisms to ingest the secrets file, compose the database server URI, and create a database on the database server, we can execute the create_db() function.
app.py
try:
    create_db()
except:
    pass
Update the service configuration
Now that the application layer is capable of establishing a connection to the database server and provisions database, you're ready to update the Docker service to utilize the secret.
🚧 Test locally first
Before propagating changes like this to Docker on MedStack Control, we recommend you first try configuring the service locally to utilize secrets.
Navigate to the service's details page and click the Update button to configure the service.
In the secrets section, click the button to Add secret and select the db_config secret from the dropdown.
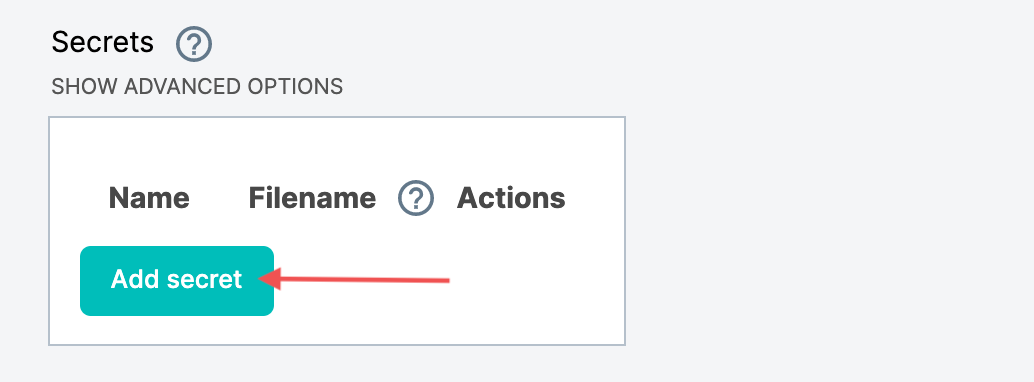
Specify the filename the application is expecting to open to ingest the secrets. In this case, the expected filename is config_db.json

Scroll down to the bottom of the service configuration page and click Update to roll out the updated service.
Resources
To view the app.py file in full, you may review it in the flask-demo project on our public GitLab registry.
- Project: flask-demo