📘 In Preview
Please note that the Infrastructure API is currently In Preview.
Overview
This article has three main sections:
We assume that you have the following prerequisites before jumping into this tutorial:
- An existing cluster in MedStack Control
- Appropriate permissions to generate API tokens on MedStack Control
- An API client - preferably Postman - installed in your system
Generate an API Token
- From the MedStack Control Dashboard navigation bar, click the displayed name on the top right corner. Select
API Tokens.

- Click
New token - Select a company
- Enter a note
- Click
Generate token

- Copy the
TOKEY KEYandTOKEN VALUE. These will be used in the Authorization header of the HTTP API requests to MedStack Control.

👍 Reminder
Make sure to copy and save the
TOKEN_VALUEbefore you navigate away from the page, as you won't be able to see it again!
Configure the API client
We will be using Postman as the API client in our examples. You can check out these resources for detailed explanations and additional instructions.
Create an environment and set variables
- From the Postman left sidebar, select
Environments> click+. - Enter a name for your new environment. Our examples we will use the name
Control Demo.
- To add a new environment variable, select the bottom row of the table and enter a
Variablename. We will configure three variables: base_urltoken_keytoken_value- Select a variable
Type. - If you choose
default, the variable value is visible in plain text. - If you choose
secret, the variable value is masked. - Enter the
Initial valueandCurrent valuefor the variable. Keep in mind that the initial value is shared with anyone who has access to the environment, and the initial value is made public if you publish the environment along with a collection.
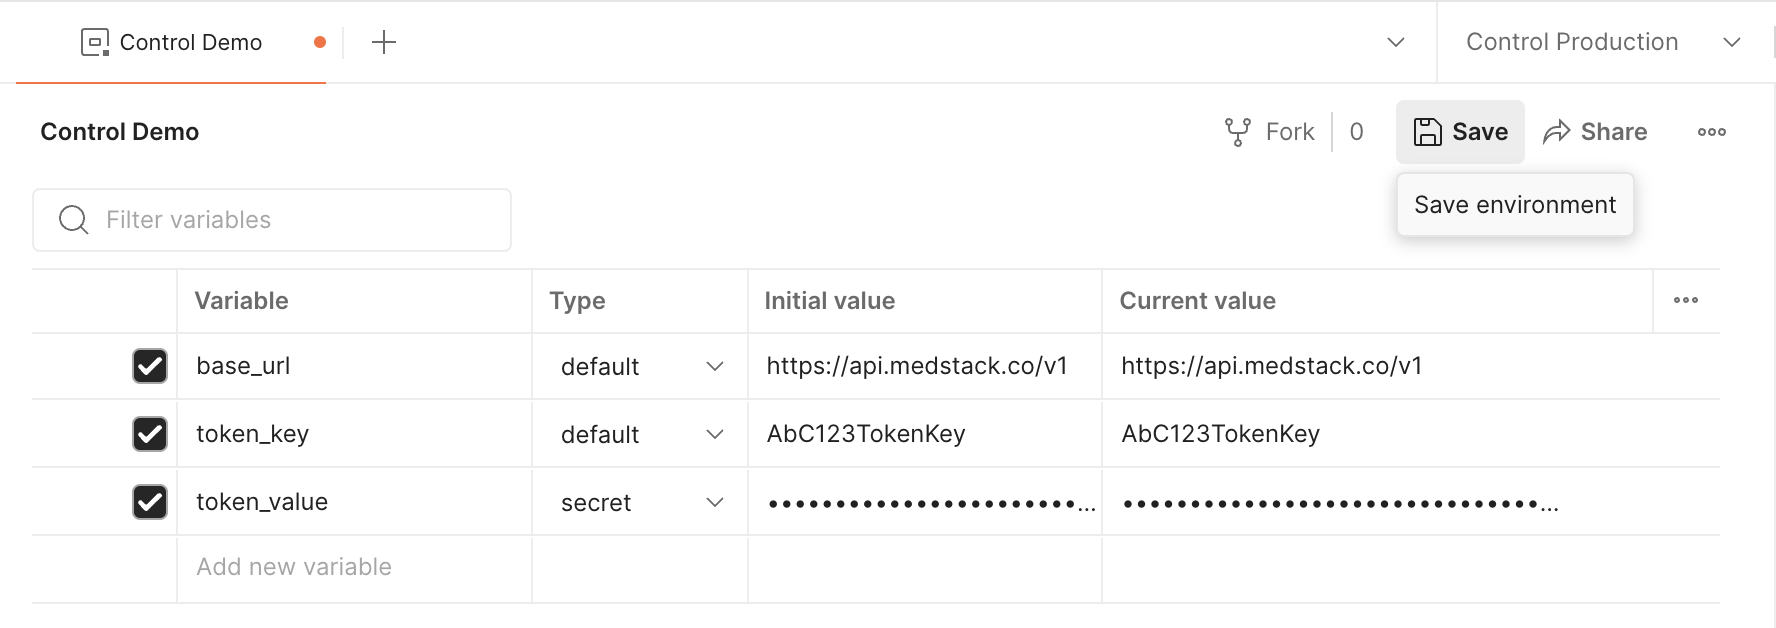
- Once you're done adding environment variables, hit
💾 Save.
Organize requests into a Collection
Let's keep things organized and reusable by grouping requests with Postman Collections.
- From the Postman left sidebar, select
Collections> click+> selectBlank collection.
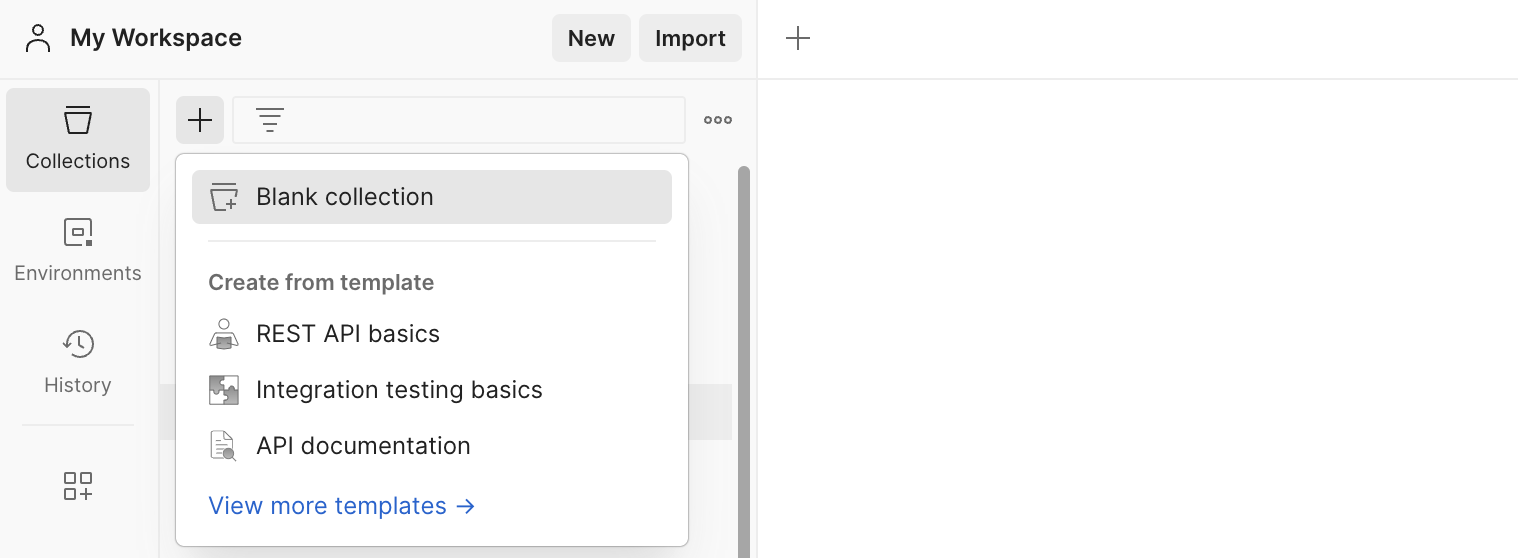 - Name the collection. Our examples will use the name
 Medstack API [Demo].
- Go to the Authorization tab
- Set Auth Type = Basic Auth.
- Set Username = {{token_key}} (added as an environment variable previously).
- Set Password = {{token_value}} (added as an environment variable previously).
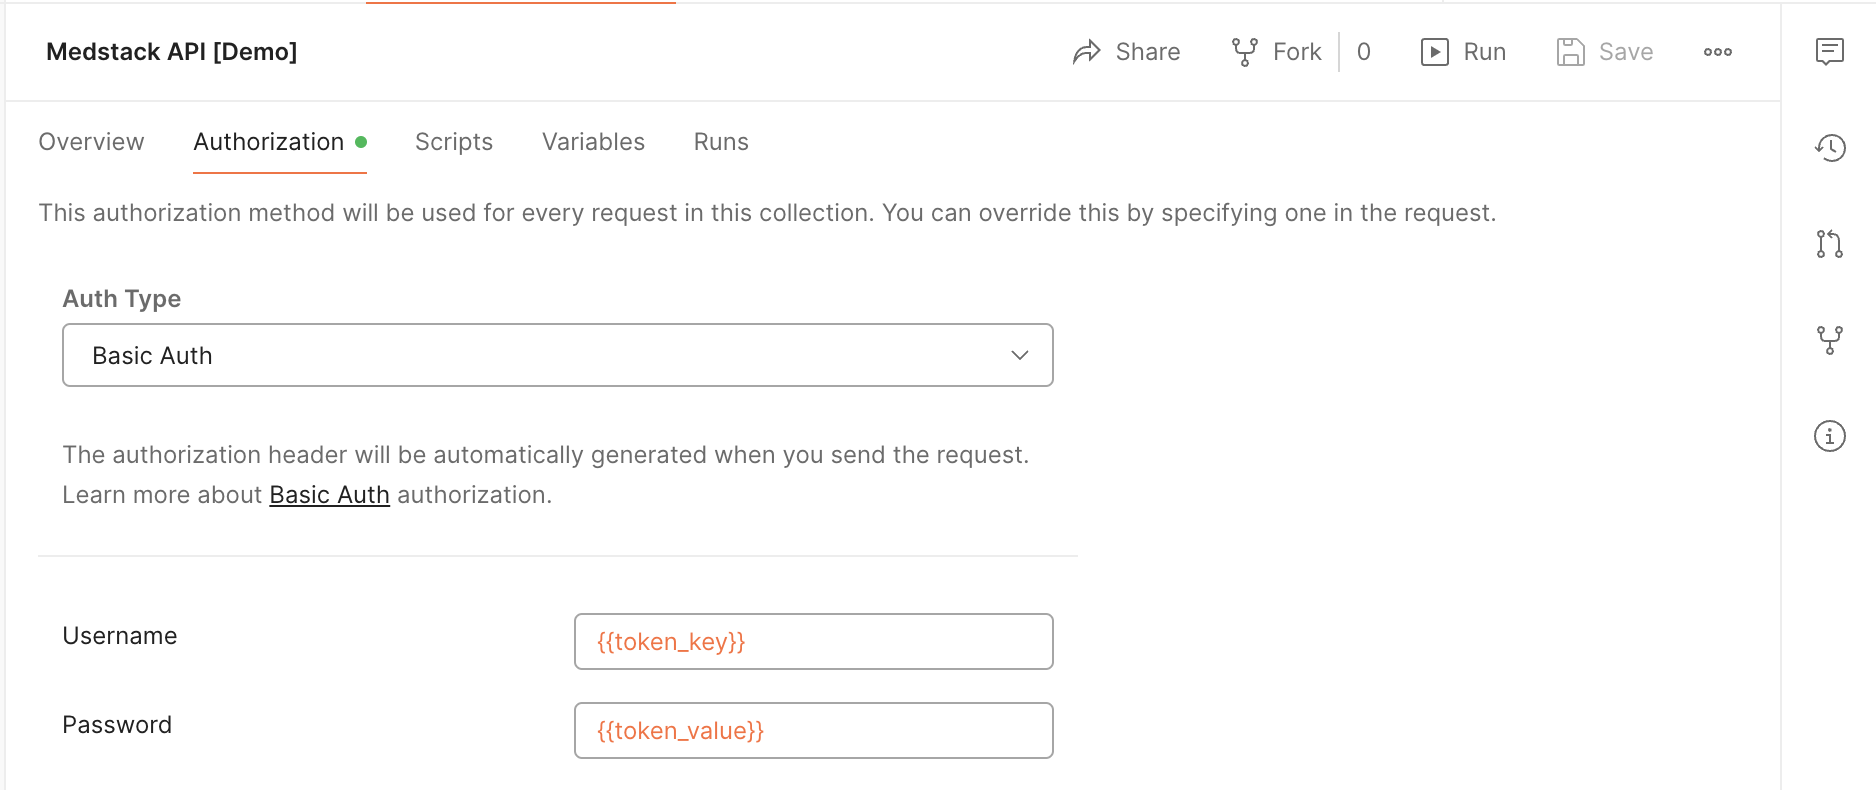
- Hit
💾 Save
Send HTTP Requests
Our first task will be to retrieve the current company for which our API token is authorized.
Retrieve current company
- From the top-left sidebar, select
New>HTTP.
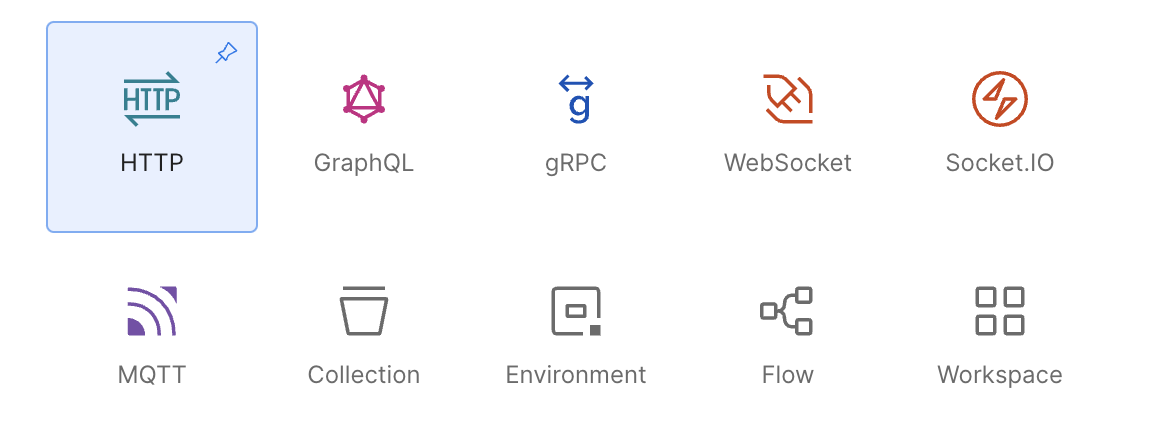 - Set
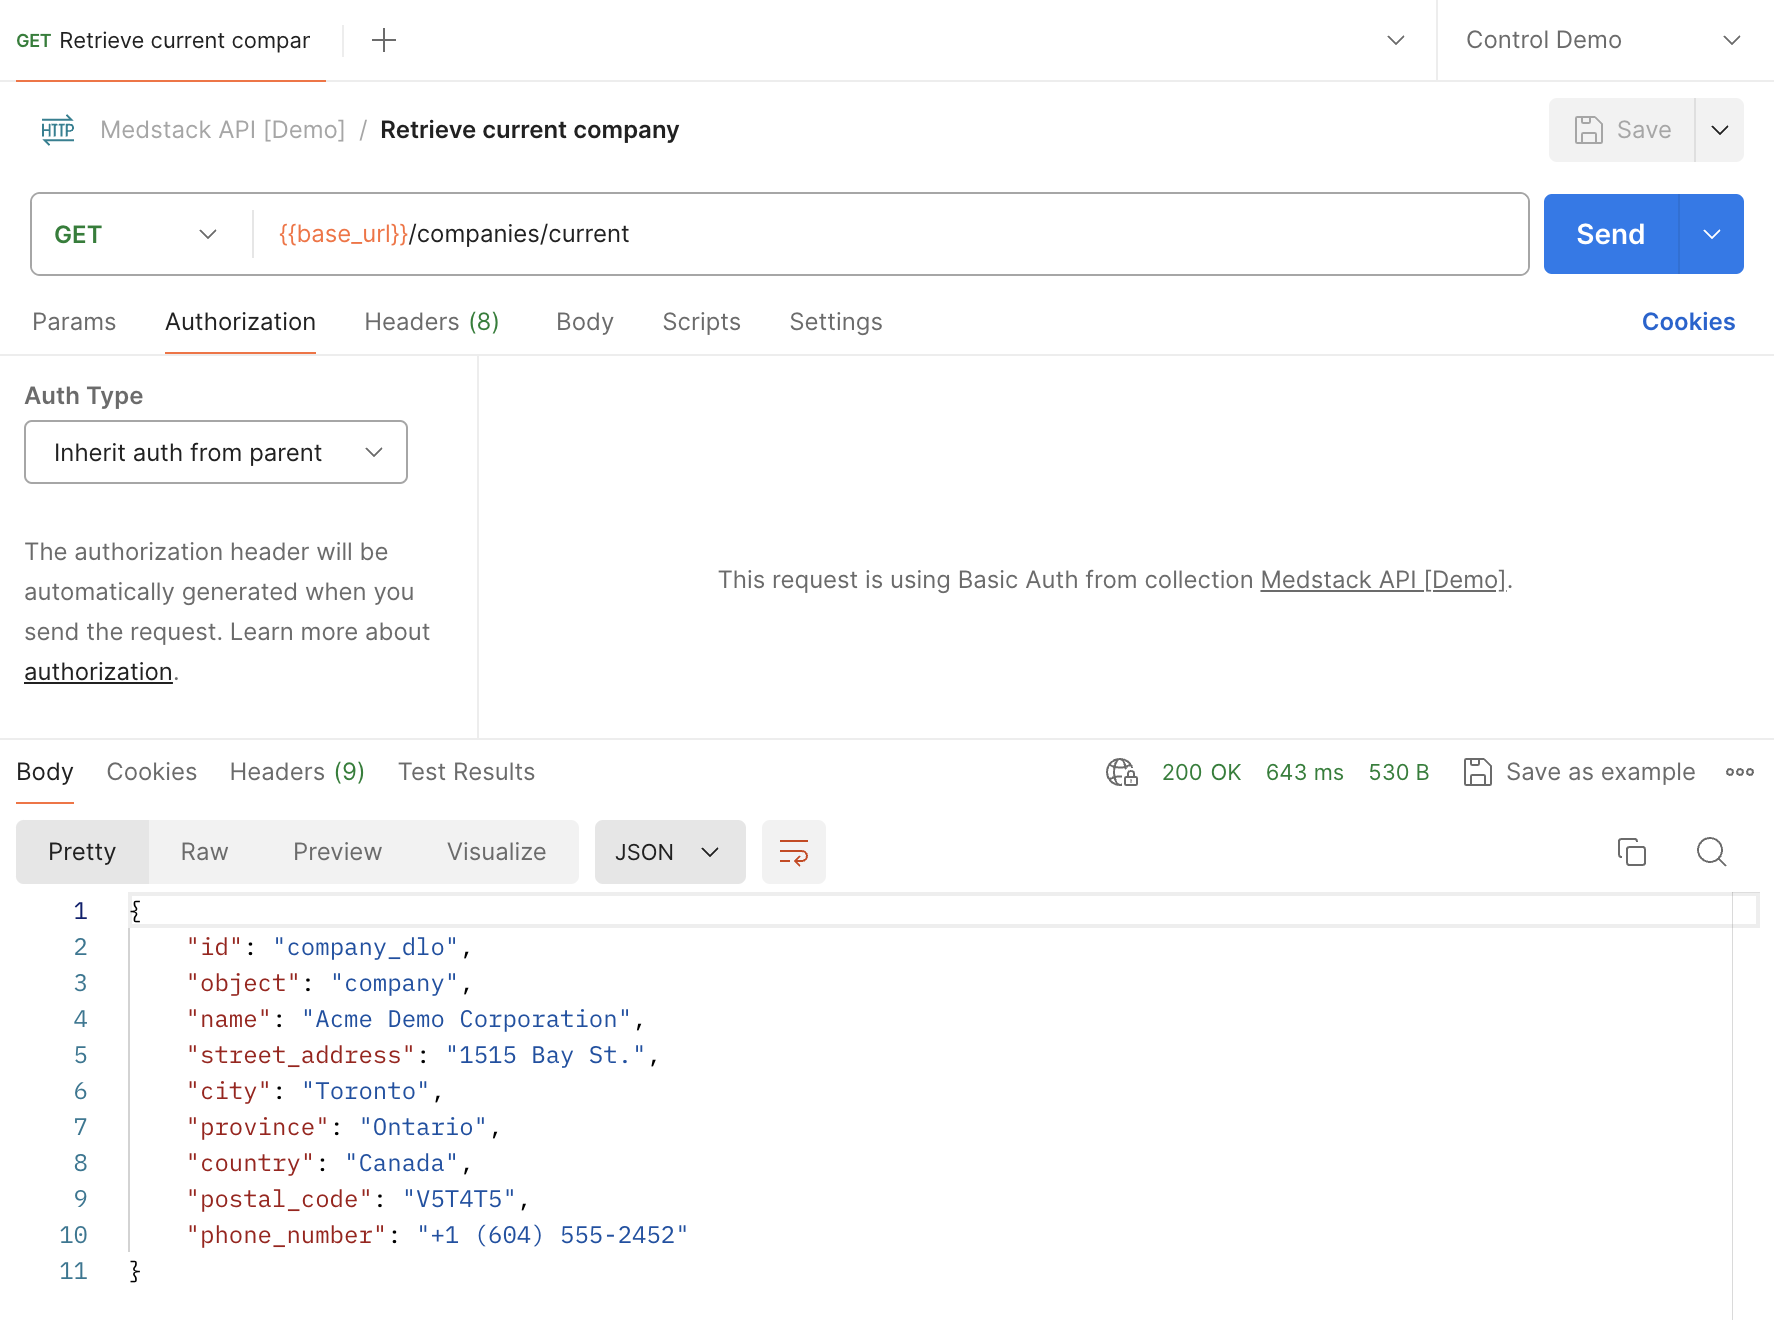
- Set method = GET
- Set URL = {{base_url}}/companies/current (added as an environment variable previously)
- Go to the Authorization tab > set Auth Type = Inherit auth from parent

- Hit
💾 Save
📘 Save to inherit authorization
When you set
Auth TypetoInherit auth from parent, you must save the API request in a collection first in order to use the parent's authorization helper. Otherwise, you will receive a401 Unauthorizederror response.
- Add
Request name. We will use the nameRetrieve current companyin this example. - In
Save to, select the collectionMedstack API [Demo]> HitSave.
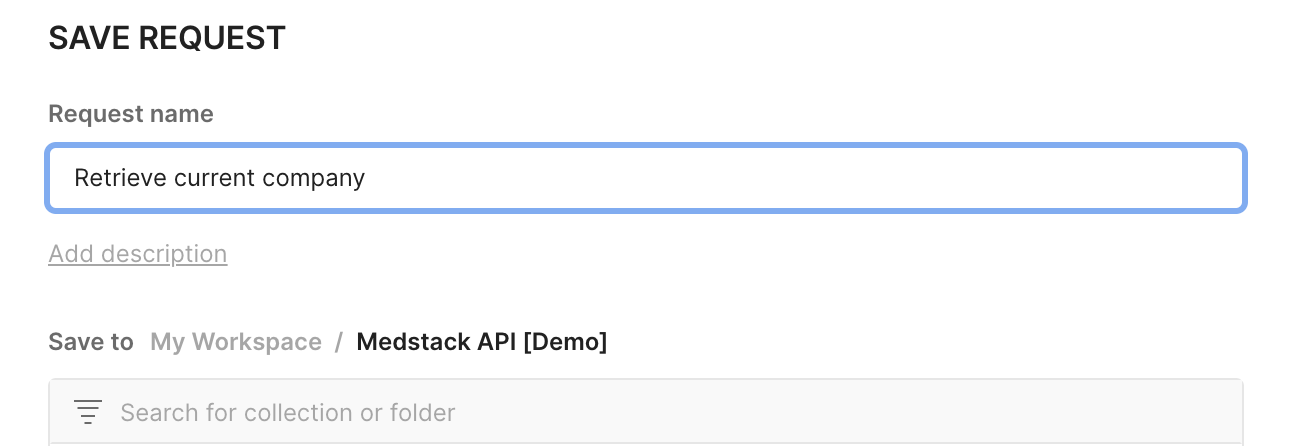
At this point, you're ready to make your first API request! 🎉
- Make sure the environment is set to
Control Demo

- Hit
Send
The response is an object containing information on the current company.

Here's the equivalent request with curl :
curl --request GET \
     --url https://api.medstack.co/v1/companies/current \
     --header 'accept: application/json' \
     --header 'authorization: Basic <token>'
Now that we have the company ID, it's time to get the list of all clusters that belong to that company.
List all clusters
- Copy the company
idfrom the response of Retrieve current company. In our example the value iscompany_dlo. - Create a new HTTP request with the following options:
method=GETURL={{base_url}}/companies/company_dlo/clusters(added as an environment variable previously)- In the
Authorizationtab, setAuth Type=Inherit auth from parent. - Save as
List all clusterswithin the collectionMedstack API [Demo]. - Make sure the environment is set to
Control Demo. - Send the request.
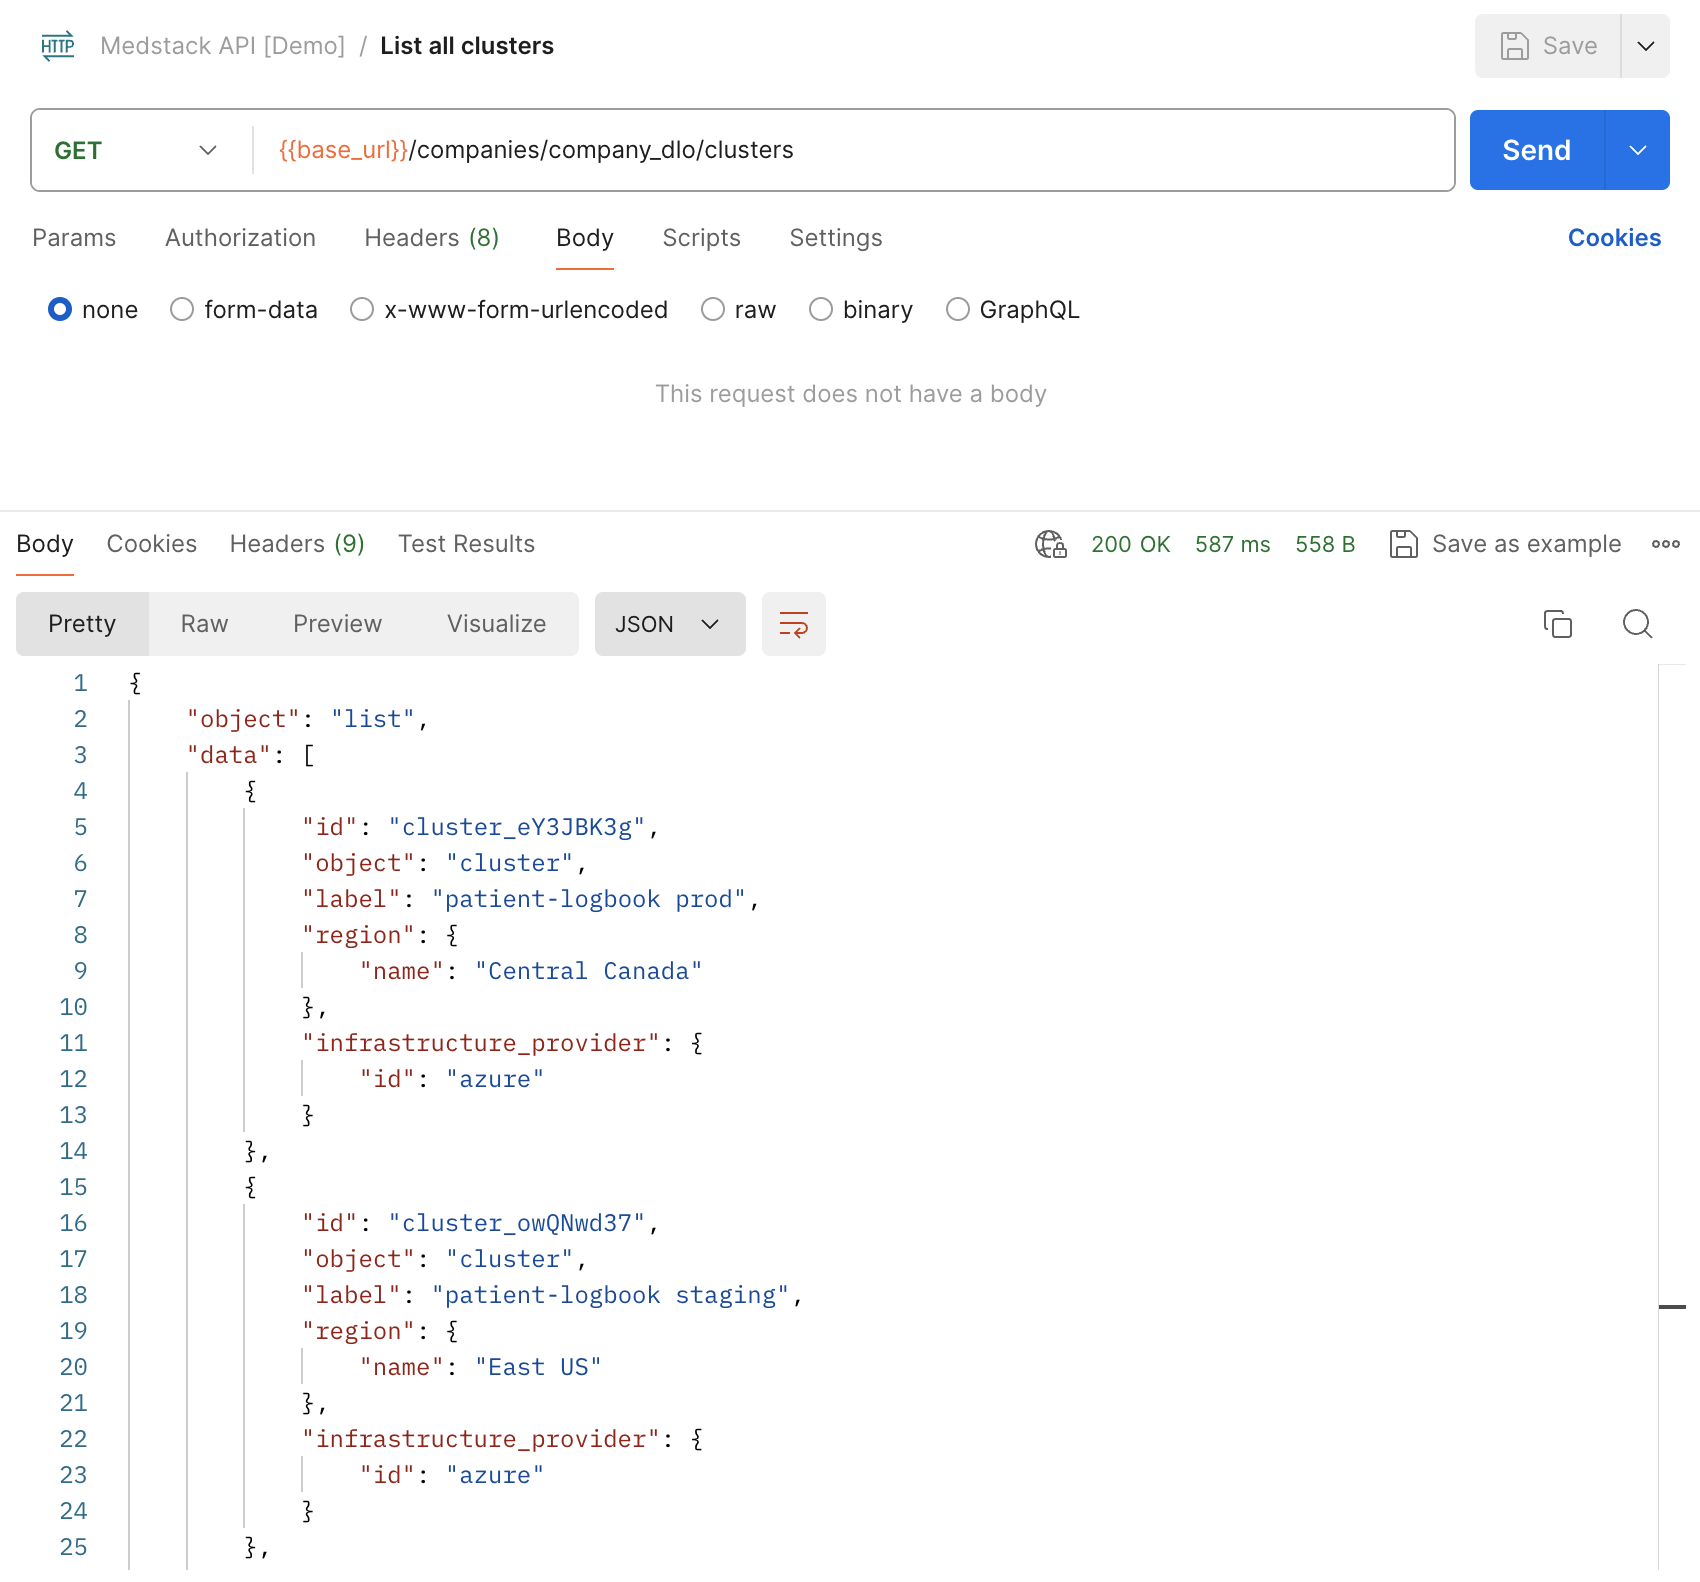
Here's the equivalent request with curl:
curl --request GET \
     --url https://api.medstack.co/v1/companies/company_dlo/clusters \
     --header 'accept: application/json' \
     --header 'authorization: Basic <token>'
Now that we have the ID of the cluster, we can now start working with nodes!
List all node sizes
In order to create a node, we need to know what node sizes are available to the cluster, and choose an option that best suite our needs.
- Copy the company
idfrom the response of Retrieve current company. In our example the value iscompany_dlo. - Copy the cluster
idfrom the response of List all clusters. In our example we are choosing the cluster labeled "patient-logbook staging", with IDcluster_owQNwd37. - Create a new HTTP request with the following options:
method=GETURL={{base_url}}/companies/company_dlo/clusters/cluster_owQNwd37/node-sizes(added as an environment variable previously)- In the
Authorizationtab, setAuth Type=Inherit auth from parent. - Save as
List all node sizeswithin the collectionMedstack API [Demo]. - Make sure the environment is set to
Control Demo. - Send the request.
In the response we can see that 4 node sizes are available to this cluster:
{
    "object": "list",
    "data": [
        {
            "id": "node_size_kwM9o3B8",
            "object": "node_size",
            "title": "Small: 1 core, 2 GiB",
            "vcpu": 1,
            "memory": 2.0
        },
        {
            "id": "node_size_eY3J1QgW",
            "object": "node_size",
            "title": "Medium: 2 cores, 4 GiB",
            "vcpu": 2,
            "memory": 4.0
        },
        {
            "id": "node_size_q8ZvrZpm",
            "object": "node_size",
            "title": "Large: 2 cores, 8 GiB",
            "vcpu": 2,
            "memory": 8.0
        },
        {
            "id": "node_size_LB3DqZxe",
            "object": "node_size",
            "title": "X-Large: 4 cores, 16 GiB",
            "vcpu": 4,
            "memory": 16.0
        }
    ]
}
Here's the equivalent request with curl:
curl --request GET \
     --url https://api.medstack.co/v1/companies/company_dlo/clusters/cluster_owQNwd37/node-sizes \
     --header 'accept: application/json' \
     --header 'authorization: Basic <token>'
Now let's create a node in the cluster, starting with something small.
Create a node
- Copy the company
idfrom the response of Retrieve current company. In our example the value iscompany_dlo. - Copy the cluster
idfrom the response of List all clusters. In our example we are choosing the cluster labeled "patient-logbook staging", with IDcluster_owQNwd37. - Create a new HTTP request with the following options:
method=POSTURL={{base_url}}/companies/company_dlo/clusters/cluster_owQNwd37/nodes(added as an environment variable previously)- In the
Bodytab - Select
raw> selectJSON - Provide the node size ID in the body. In our example, we are choosing small with ID
node_size_kwM9o3B8
{
  "size_id": "node_size_kwM9o3B8"
}
- In the
Authorizationtab, setAuth Type=Inherit auth from parent. - Save as
Create a nodewithin the collectionMedstack API [Demo]. - Make sure the environment is set to
Control Demo. - Send the request.
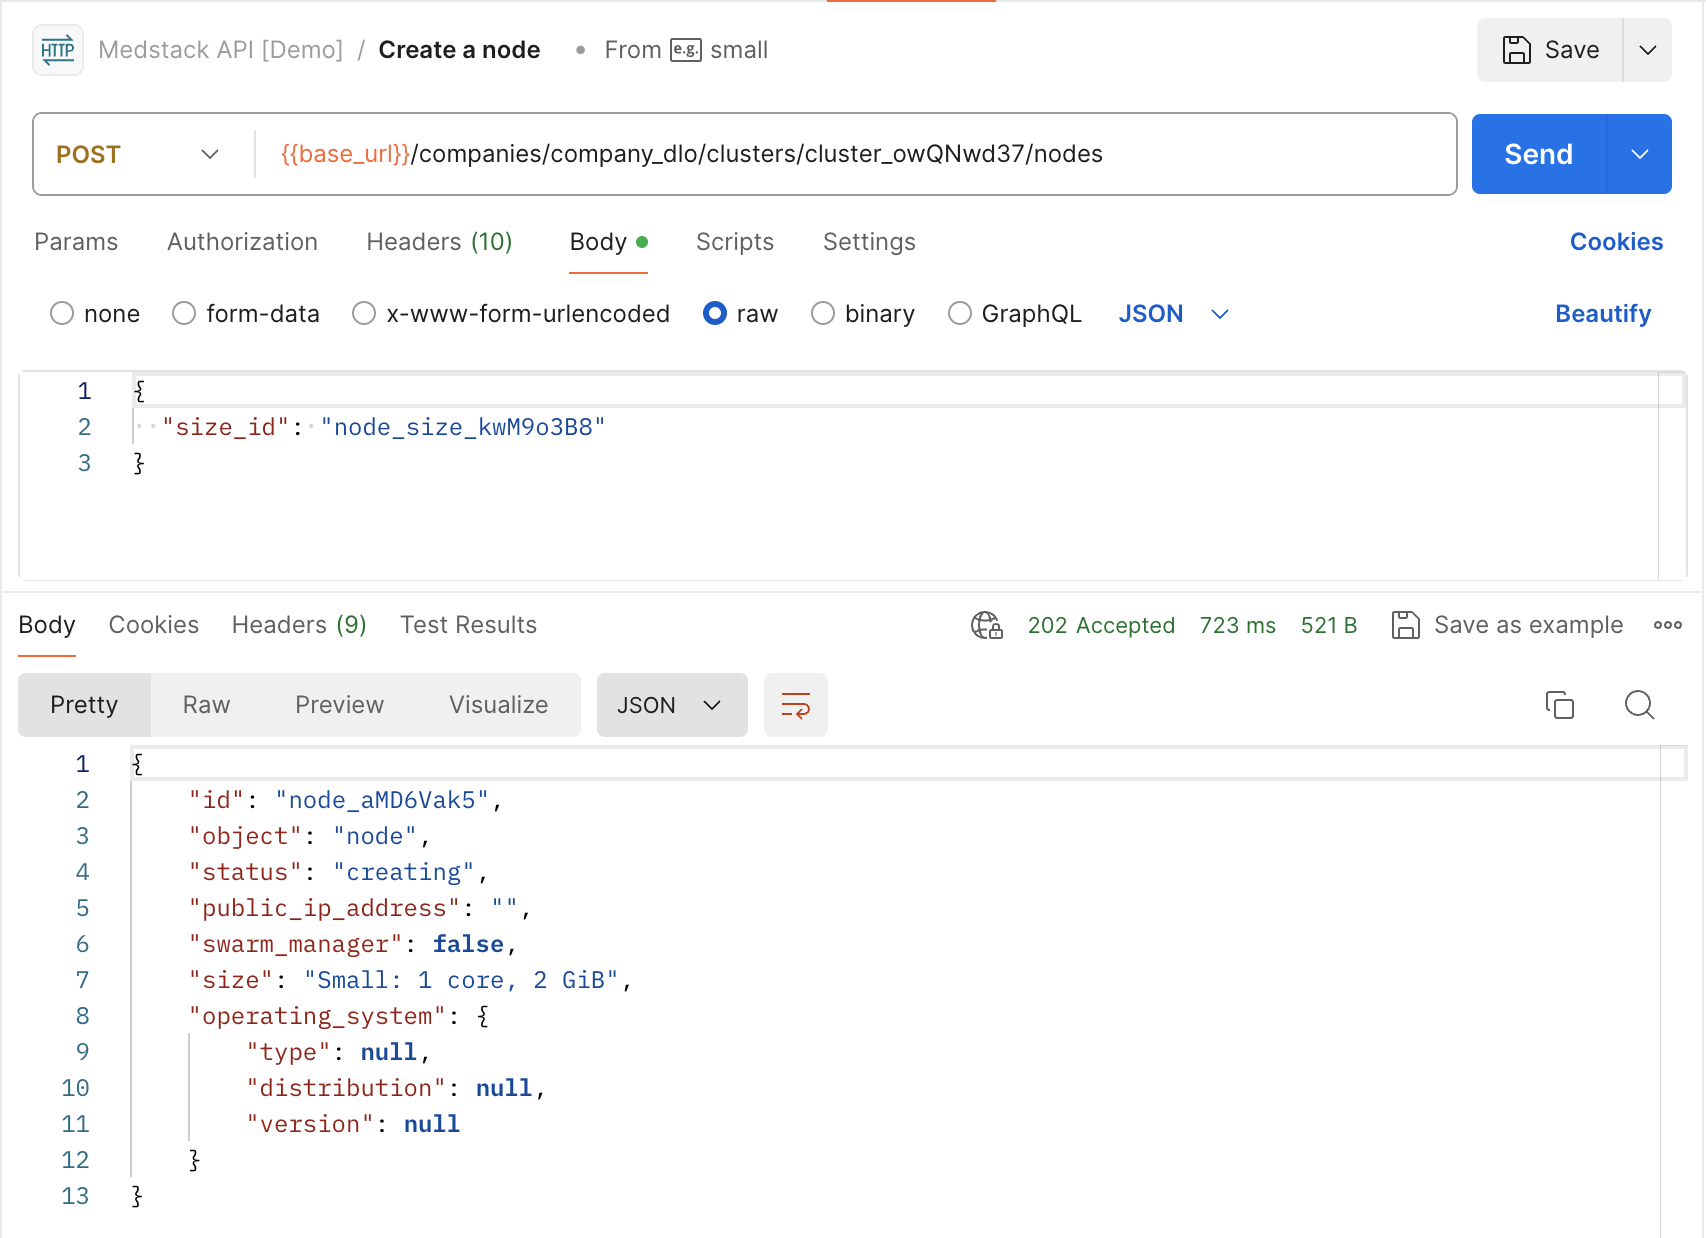
Notice that the response status is 202 Accepted. The returned body includes a status field, which has the value creating. We also do not have a public_ip_address or an operating_system yet. This is because the management of cloud infrastructure such as virtual machines is asynchronous in nature and typically involves long-running tasks.
You will need to poll the node during creation, and once complete, it will display an active status.
Here is the equivalent request with curl:
curl --request POST \
     --url https://api.medstack.co/v1/companies/company_dlo/clusters/cluster_owQNwd37/nodes \
     --header 'accept: application/json' \
     --header 'authorization: Basic <token>' \
     --header 'content-type: application/json' \
     --data '{
       "size_id": "node_size_kwM9o3B8"
     }'
In the next section, let's look at how to retrieve the new node and check its status.
Retrieve a single node
- Copy the company
idfrom the response of Retrieve current company. In our example the value iscompany_dlo. - Copy the cluster
idfrom the response of List all clusters. In our example we are choosing the cluster labeled "patient-logbook staging", with IDcluster_owQNwd37. - Copy the node
idfrom the response of Create a node. In our example the value isnode_aMD6Vak5. - Create a new HTTP request with the following options:
method=GETURL={{base_url}}/companies/company_dlo/clusters/cluster_owQNwd37/nodes/node_aMD6Vak5(added as an environment variable previously)- In the
Authorizationtab, setAuth Type=Inherit auth from parent. - Save as
Retrieve a single nodewithin the collectionMedstack API [Demo]. - Make sure the environment is set to
Control Demo. - Send the request.
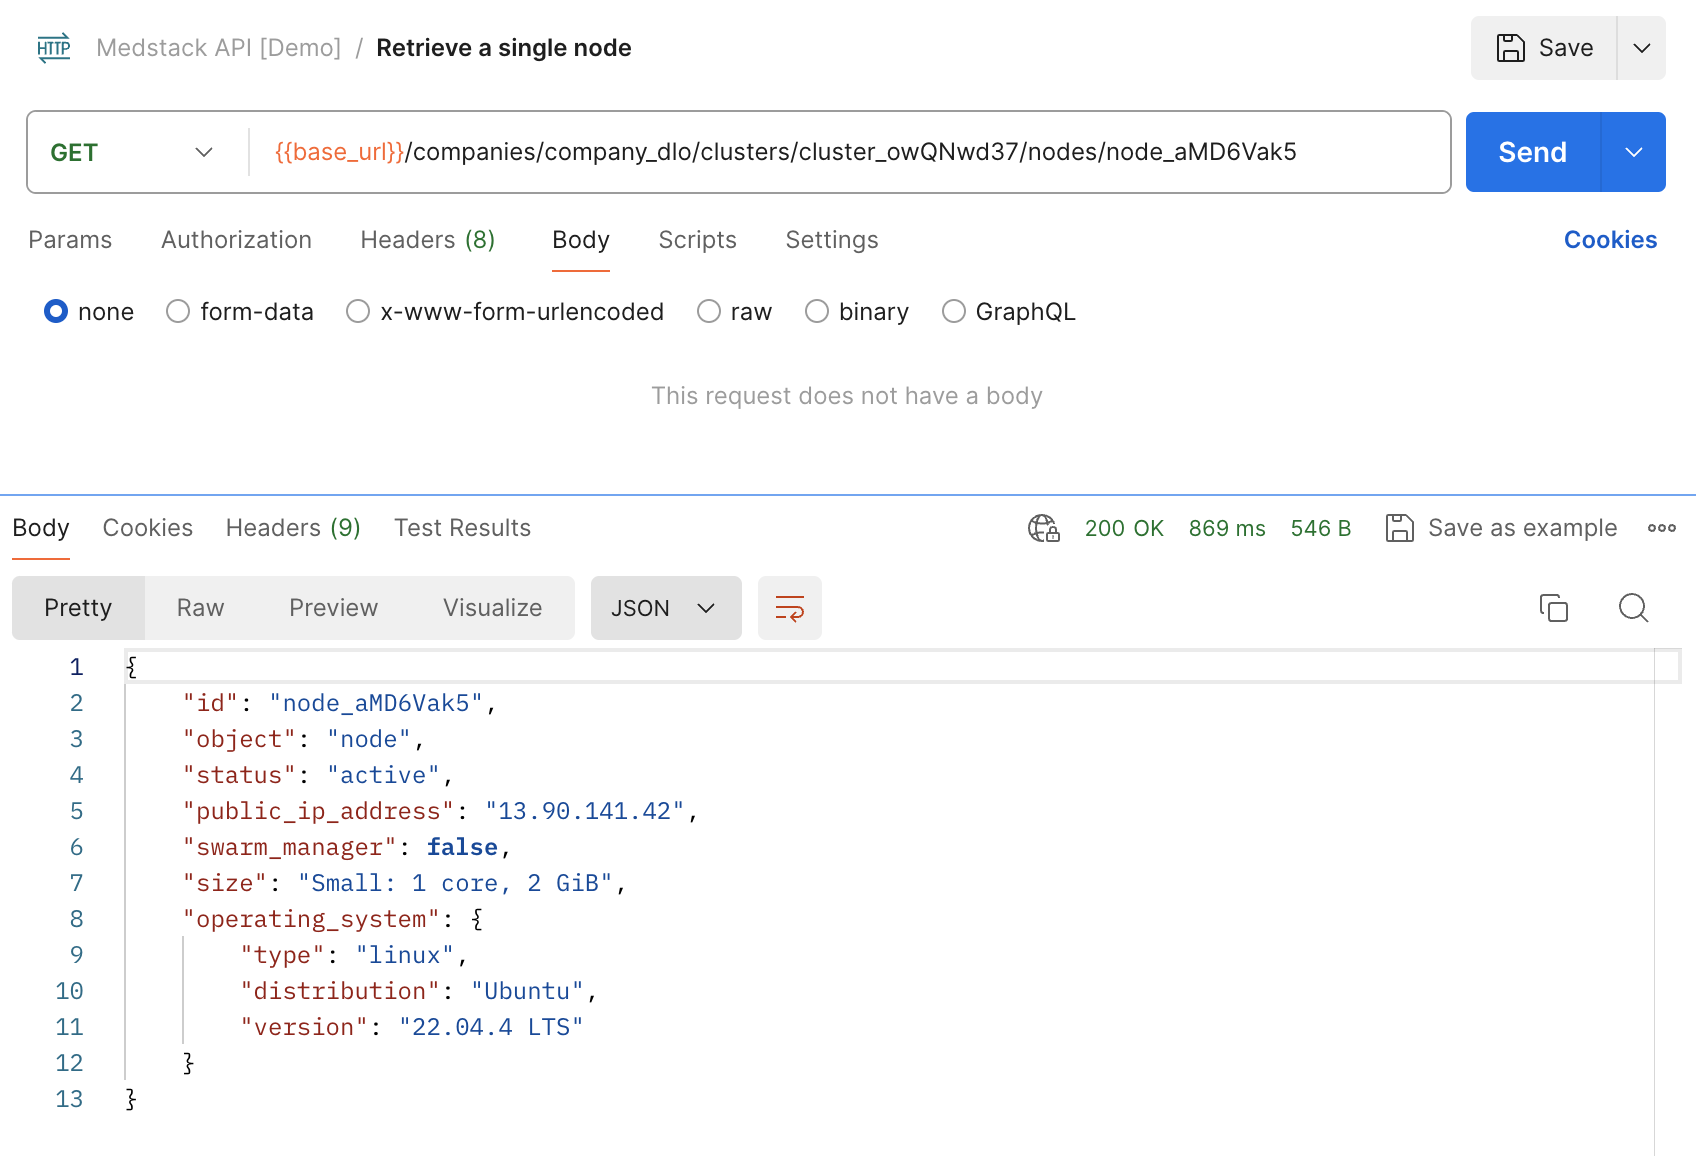
After waiting a few minutes and checking the node again, we see that it now has an active status, as well as the assigned public_ip_address and operating_system.
Here is the equivalent request with curl:
curl --request GET \
     --url https://api.medstack.co/v1/companies/company_dlo/clusters/cluster_eY3JBK3g/nodes/node_aMD6Vak5 \
     --header 'accept: application/json' \
     --header 'authorization: Basic <token>'
The node is now ready to accept other actions, such as resize, which we'll go over next.
🚧 But first, a word of caution
To the extent possible, it is advisable to run actions on cluster resources synchronously (in other words, waiting for one action to complete before running another one) so as to avoid race conditions that could cause unexpected behaviours and/or services being marked as unavailable.
Resize a node
This endpoint allows you to vertically scale a node based on a variety of factors, such as traffic, consumption and/or a specified schedule. For instance, you might want to scale up a node or multiple nodes during peak business hours when resource utilization is known to be high, then scale it down at night when traffic is significantly lower, both triggered by a scheduler.
Below are the steps used to resize a node to medium.
- Copy the company
idfrom the response of Retrieve current company. In our example the value iscompany_dlo. - Copy the cluster
idfrom the response of List all clusters. In our example we are choosing the cluster labeled "patient-logbook staging", with IDcluster_owQNwd37. - Copy the node
idfrom the response of Create a node. In our example the value isnode_aMD6Vak5. - Create a new HTTP request with the following options:
method=PATCHURL={{base_url}}/companies/company_dlo/clusters/cluster_owQNwd37/nodes/node_aMD6Vak5(added as an environment variable previously)- In the
Bodytab - Select
raw> selectJSON - Provide the node size ID in the body. In our example, we are choosing medium with ID
node_size_eY3J1QgW
{
  "size_id": "node_size_eY3J1QgW"
}
- In the
Authorizationtab, setAuth Type=Inherit auth from parent. - Save as
Resize a nodewithin the collectionMedstack API [Demo]. - Make sure the environment is set to
Control Demo. - Send the request.
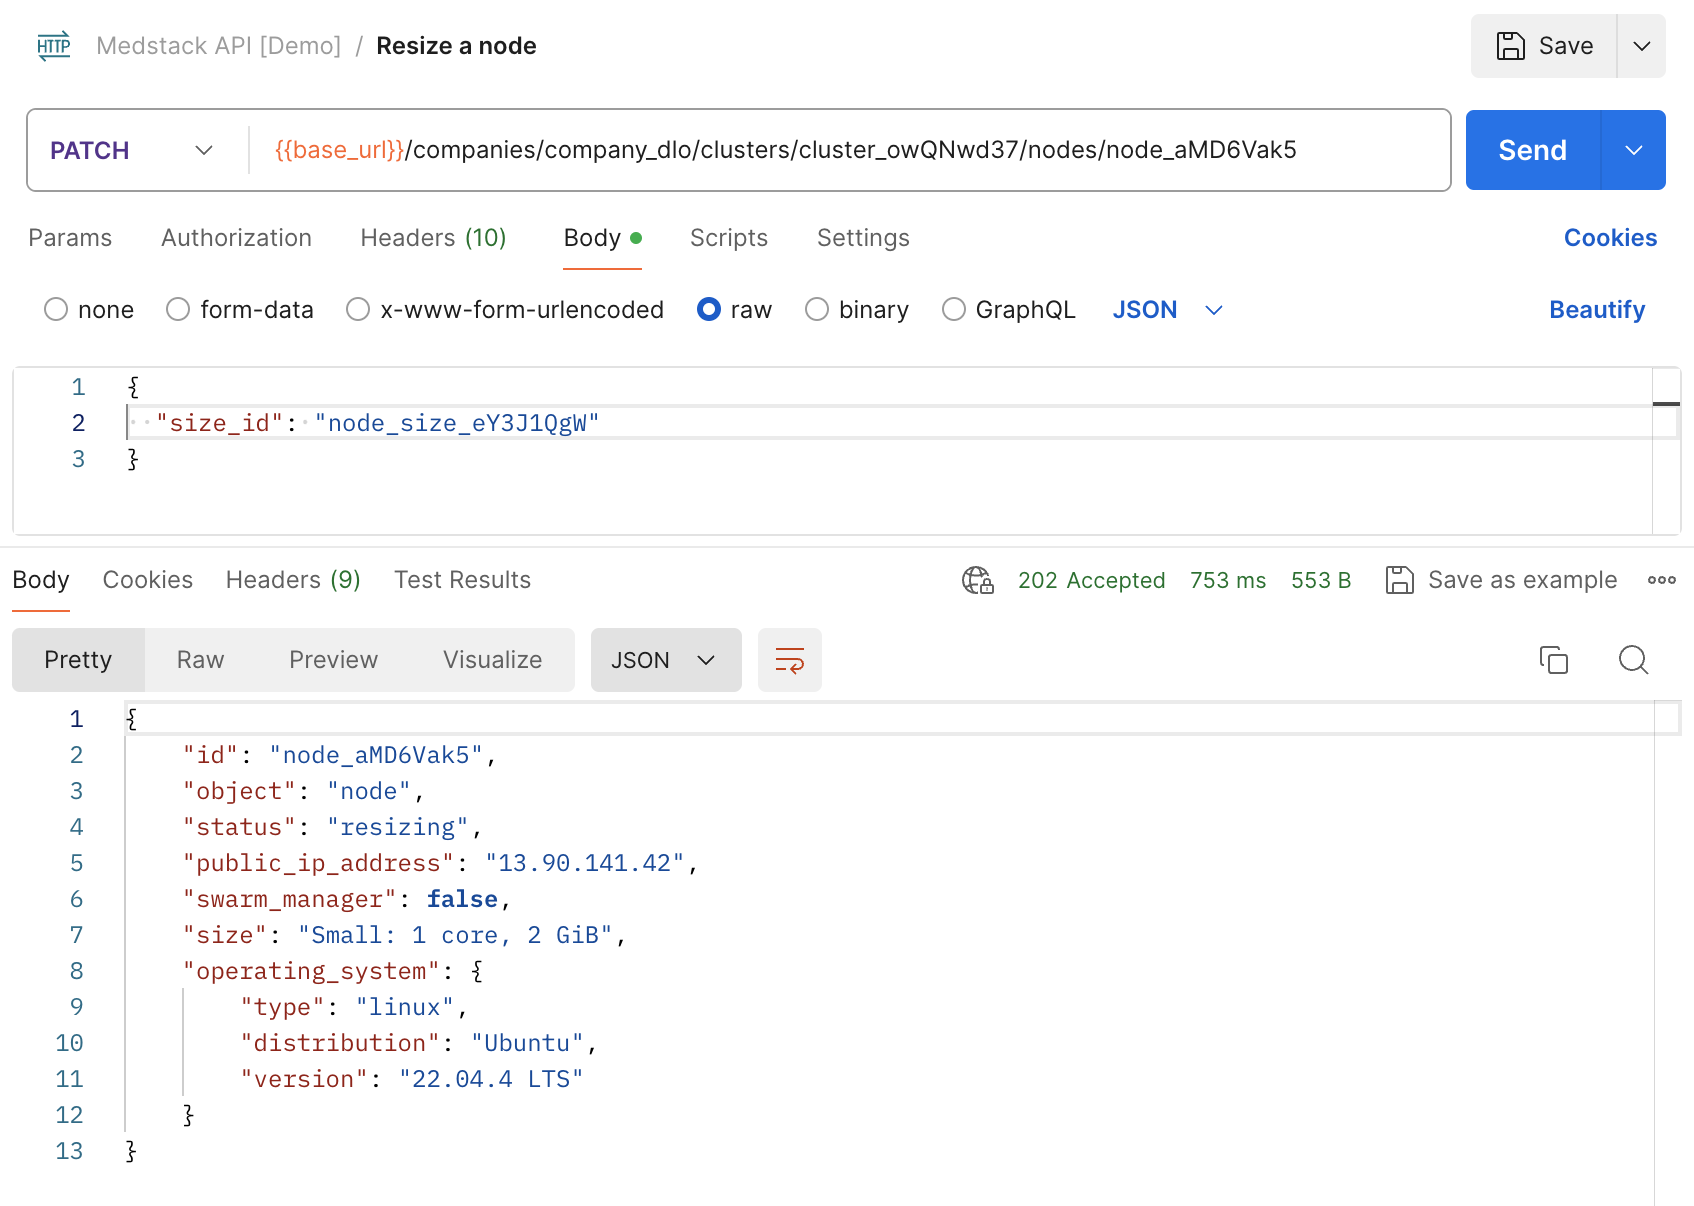
We now see that although the response's status field shows resizing, its initial size"Small: 1 core, 2 GiB" hasn't changed yet because the request has only been accepted, not completed.
After waiting a few minutes and polling the Retrieve a single node endpoint once again, the node should go back to an active status provided that the resize completed successfully.
Here is the equivalent request using curl:
curl --request PATCH \
     --url https://api.medstack.co/v1/companies/company_dlo/clusters/cluster_owQNwd37/nodes/node_aMD6Vak5 \
     --header 'accept: application/json' \
     --header 'authorization: Basic <token>' \
     --header 'content-type: application/json' \
     --data '{
       "size_id": "node_size_eY3J1QgW"
     }'
In addition to resize, you also have the ability to reboot a node programmatically through the API, which we'll go over next.
Reboot a node
Let's build the API request using similar options and workflow as the previous endpoints.
- Copy the company
idfrom the response of Retrieve current company. In our example the value iscompany_dlo. - Copy the cluster
idfrom the response of List all clusters. In our example we are choosing the cluster labeled "patient-logbook staging", with IDcluster_owQNwd37. - Copy the node
idfrom the response of Create a node. In our example the value isnode_aMD6Vak5. - Create a new HTTP request with the following options:
method=POSTURL={{base_url}}/companies/company_dlo/clusters/cluster_owQNwd37/nodes/node_aMD6Vak5/reboot(added as an environment variable previously)- In the
Authorizationtab, setAuth Type=Inherit auth from parent. - Save as
Reboot a nodewithin the collectionMedstack API [Demo]. - Make sure the environment is set to
Control Demo. - Send the request.
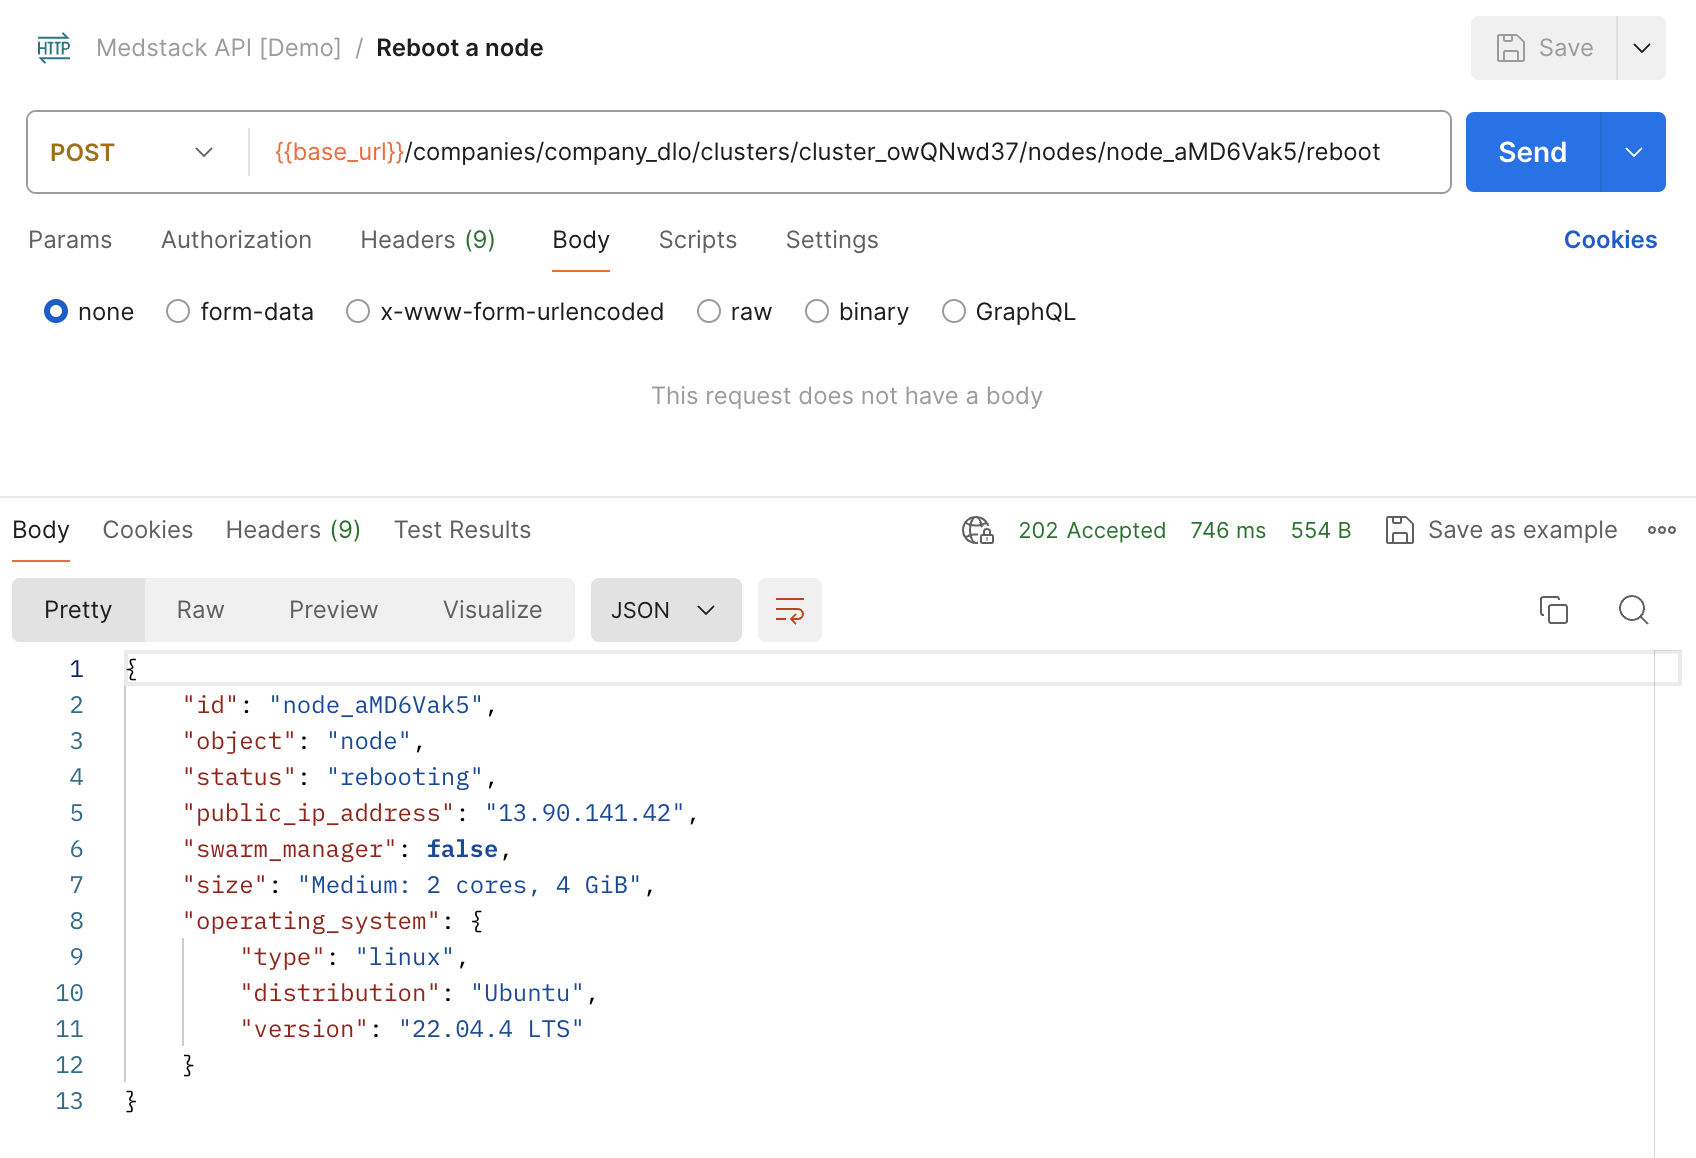
Here is the equivalent request with curl:
curl --request GET \
     --url https://api.medstack.co/v1/companies/company_dlo/clusters/cluster_eY3JBK3g/nodes/node_aMD6Vak5/reboot \
     --header 'accept: application/json' \
     --header 'authorization: Basic <token>'
Destroy a node
Finally, it's time to clean up the node.
- Copy the company
idfrom the response of Retrieve current company. In our example the value iscompany_dlo. - Copy the cluster
idfrom the response of List all clusters. In our example we are choosing the cluster labeled "patient-logbook staging", with IDcluster_owQNwd37. - Copy the node
idfrom the response of Create a node. In our example the value isnode_aMD6Vak5. - Create a new HTTP request with the following options:
method=DELETEURL={{base_url}}/companies/company_dlo/clusters/cluster_owQNwd37/nodes/node_aMD6Vak5(added as an environment variable previously)- In the
Authorizationtab, setAuth Type=Inherit auth from parent. - Save as
Destroy a nodewithin the collectionMedstack API [Demo]. - Make sure the environment is set to
Control Demo. - Send the request.
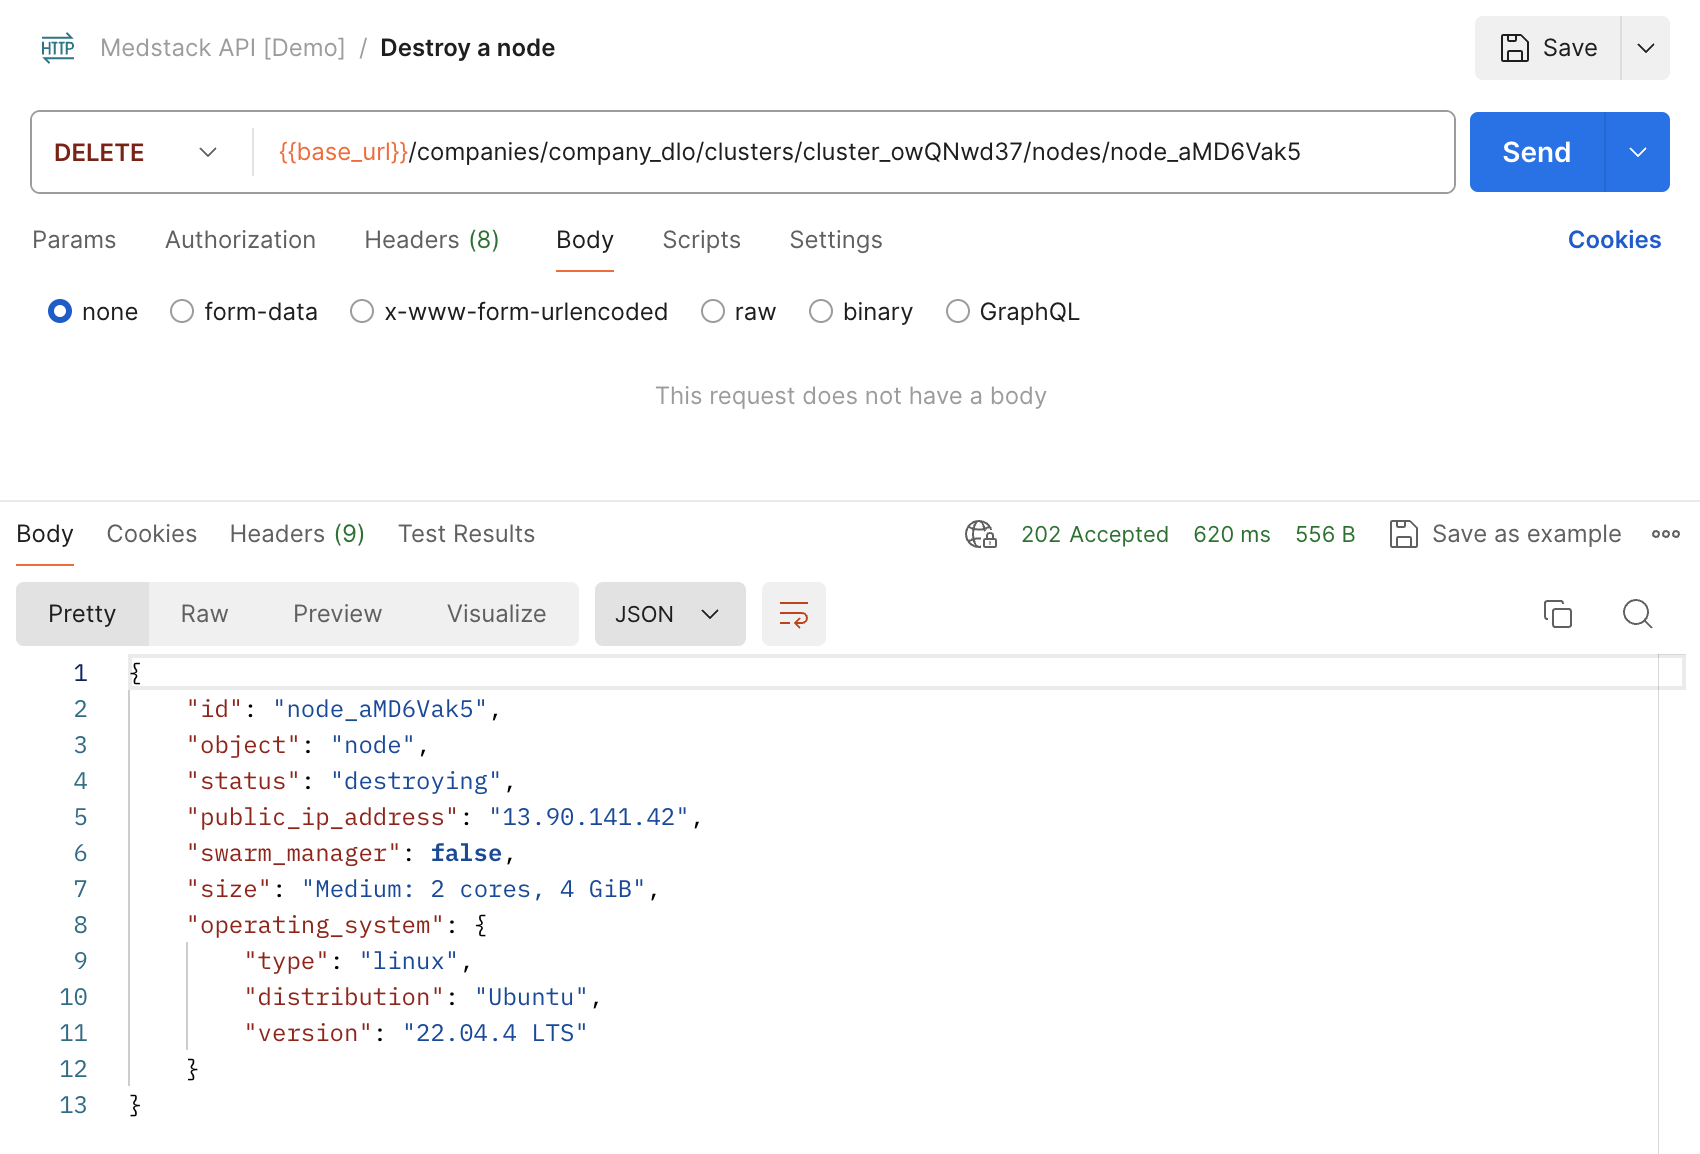
Here is the equivalent request with curl:
curl --request DELETE \
     --url https://api.medstack.co/v1/companies/company_dlo/clusters/cluster_eY3JBK3g/nodes/node_aMD6Vak5 \
     --header 'accept: application/json' \
     --header 'authorization: Basic <token>'
For the full documentation and additional resources, check out the main Infrastructure API reference page.